
Integrating HiBob with Declaree helps you streamline HR and expense processes by syncing employee data automatically. Follow the steps below to get set up quickly and securely.
Traveller’s Profile Data points
The following data fields are synchronized from HiBob to Declaree, ensuring that user profiles are consistently updated and aligned with employee data.
|
Field Definition |
Mandatory |
HiBob Field |
Declaree Field |
Notes |
|---|---|---|---|---|
|
Unique ID |
Yes |
ID |
External ID |
Database field, not visible in the application. |
|
Login |
Yes |
|
Username |
Email is used as the unique identifier for the employee in HiBob. |
|
First Name |
Yes |
FirstName |
First Name |
– |
|
Last Name |
Yes |
Surname |
Last Name |
– |
|
|
Yes |
|
|
– |
|
Internal Status |
Yes |
InternalStatus |
Enabled |
If InternalStatus = Activate, then Enabled = True. Otherwise, Enabled = False. |
|
Supervisor |
No |
Reports to |
Submits to |
– |
|
Employee Id |
No |
|
Code |
|
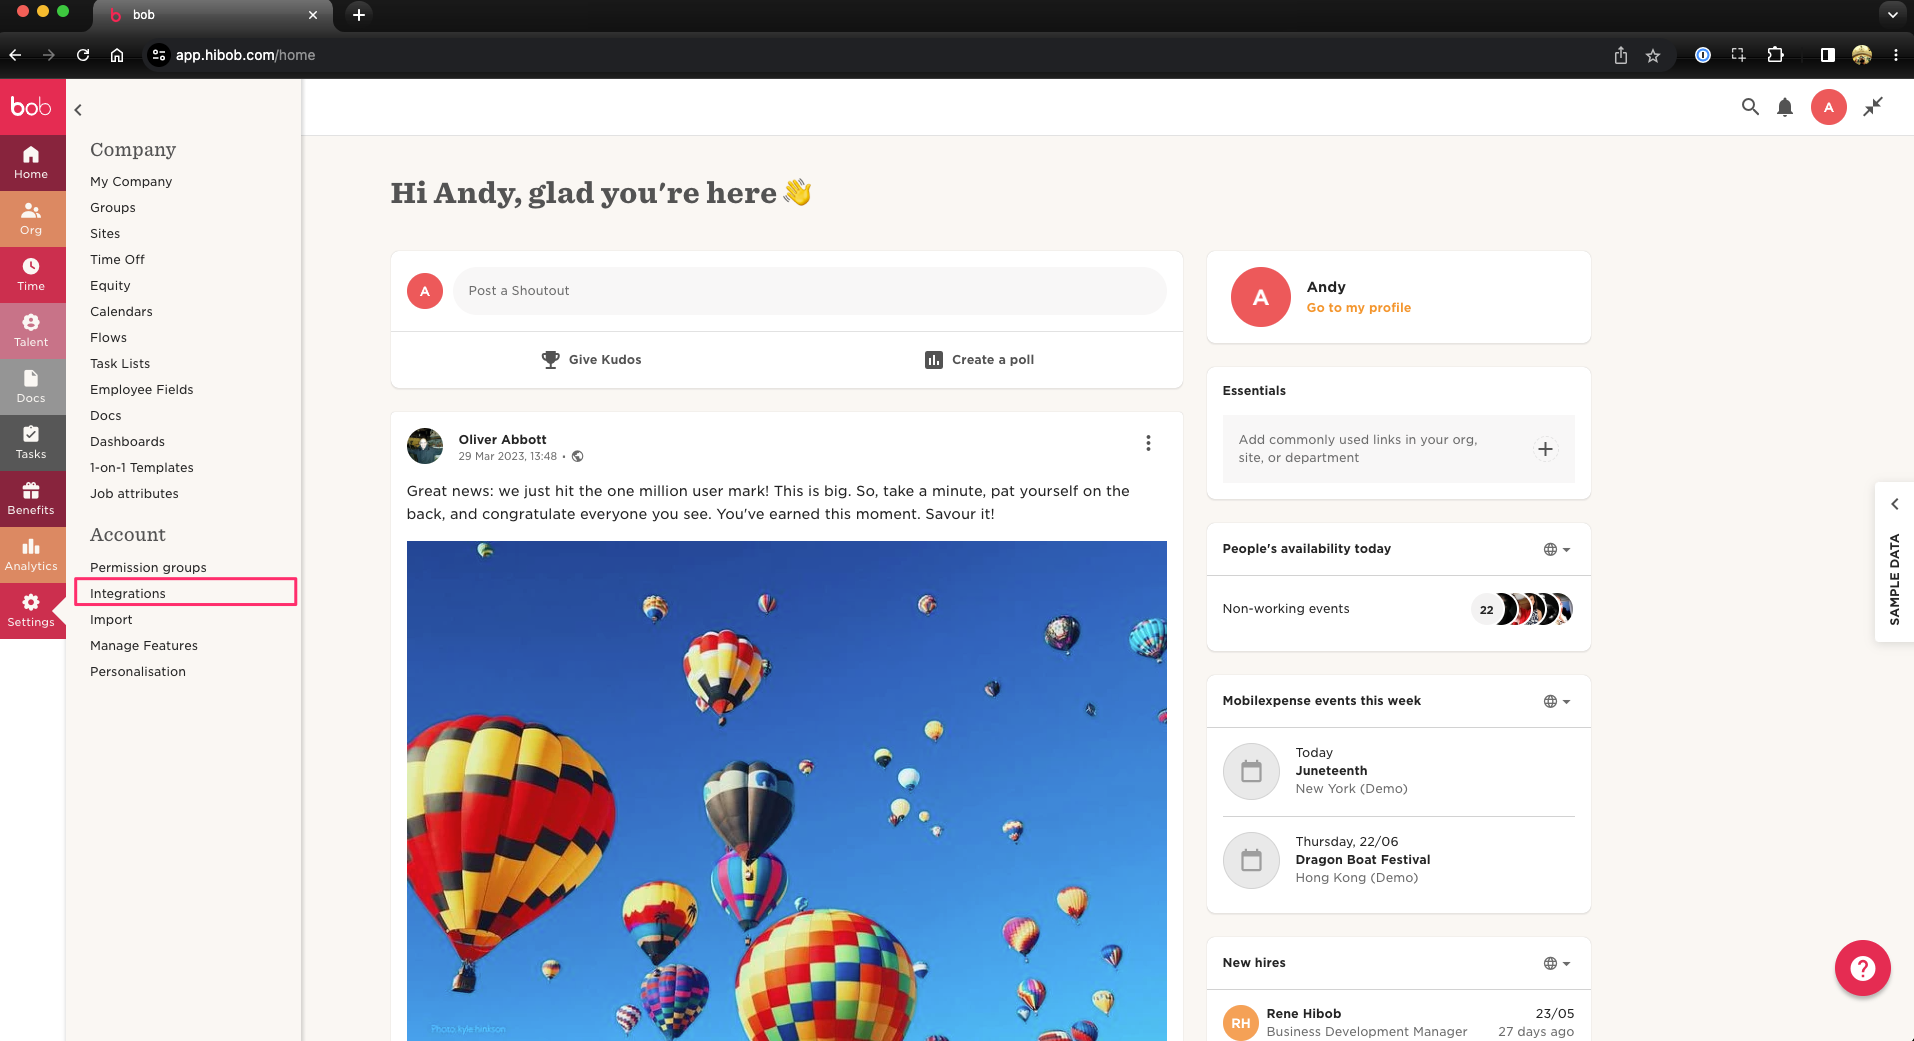
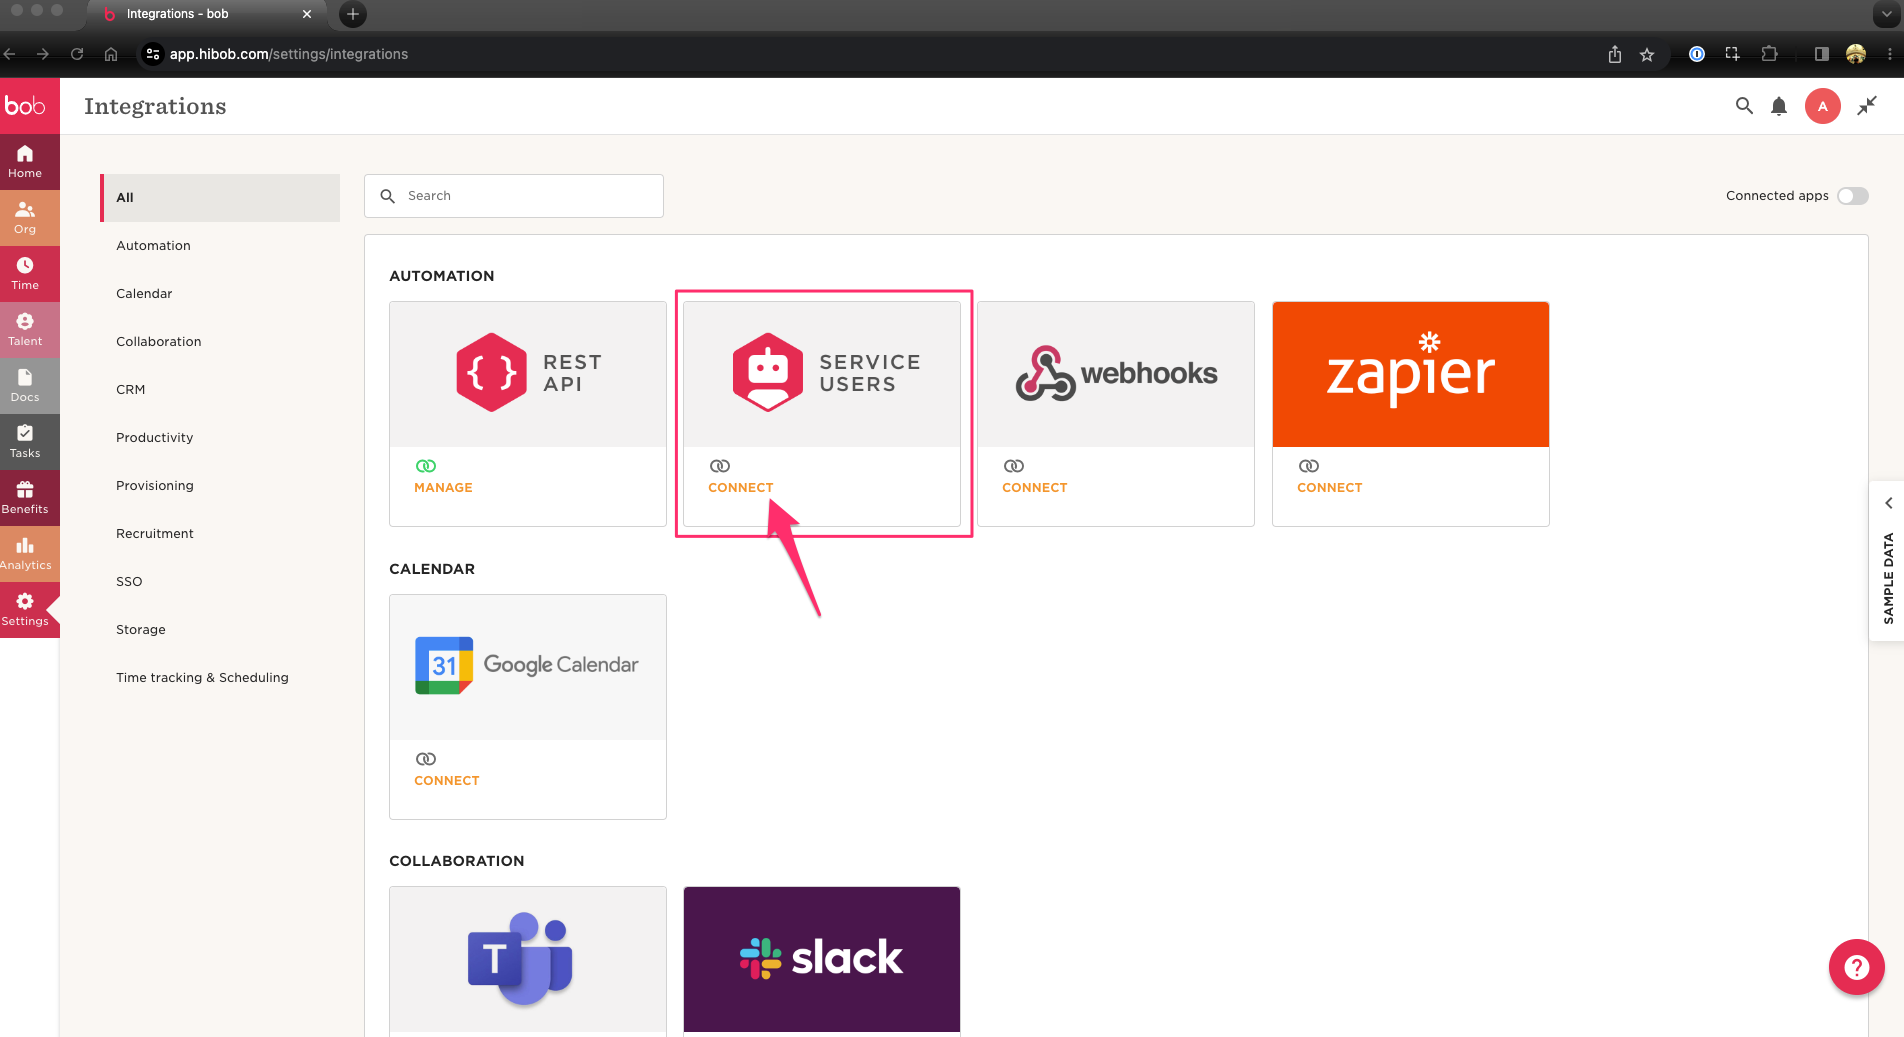
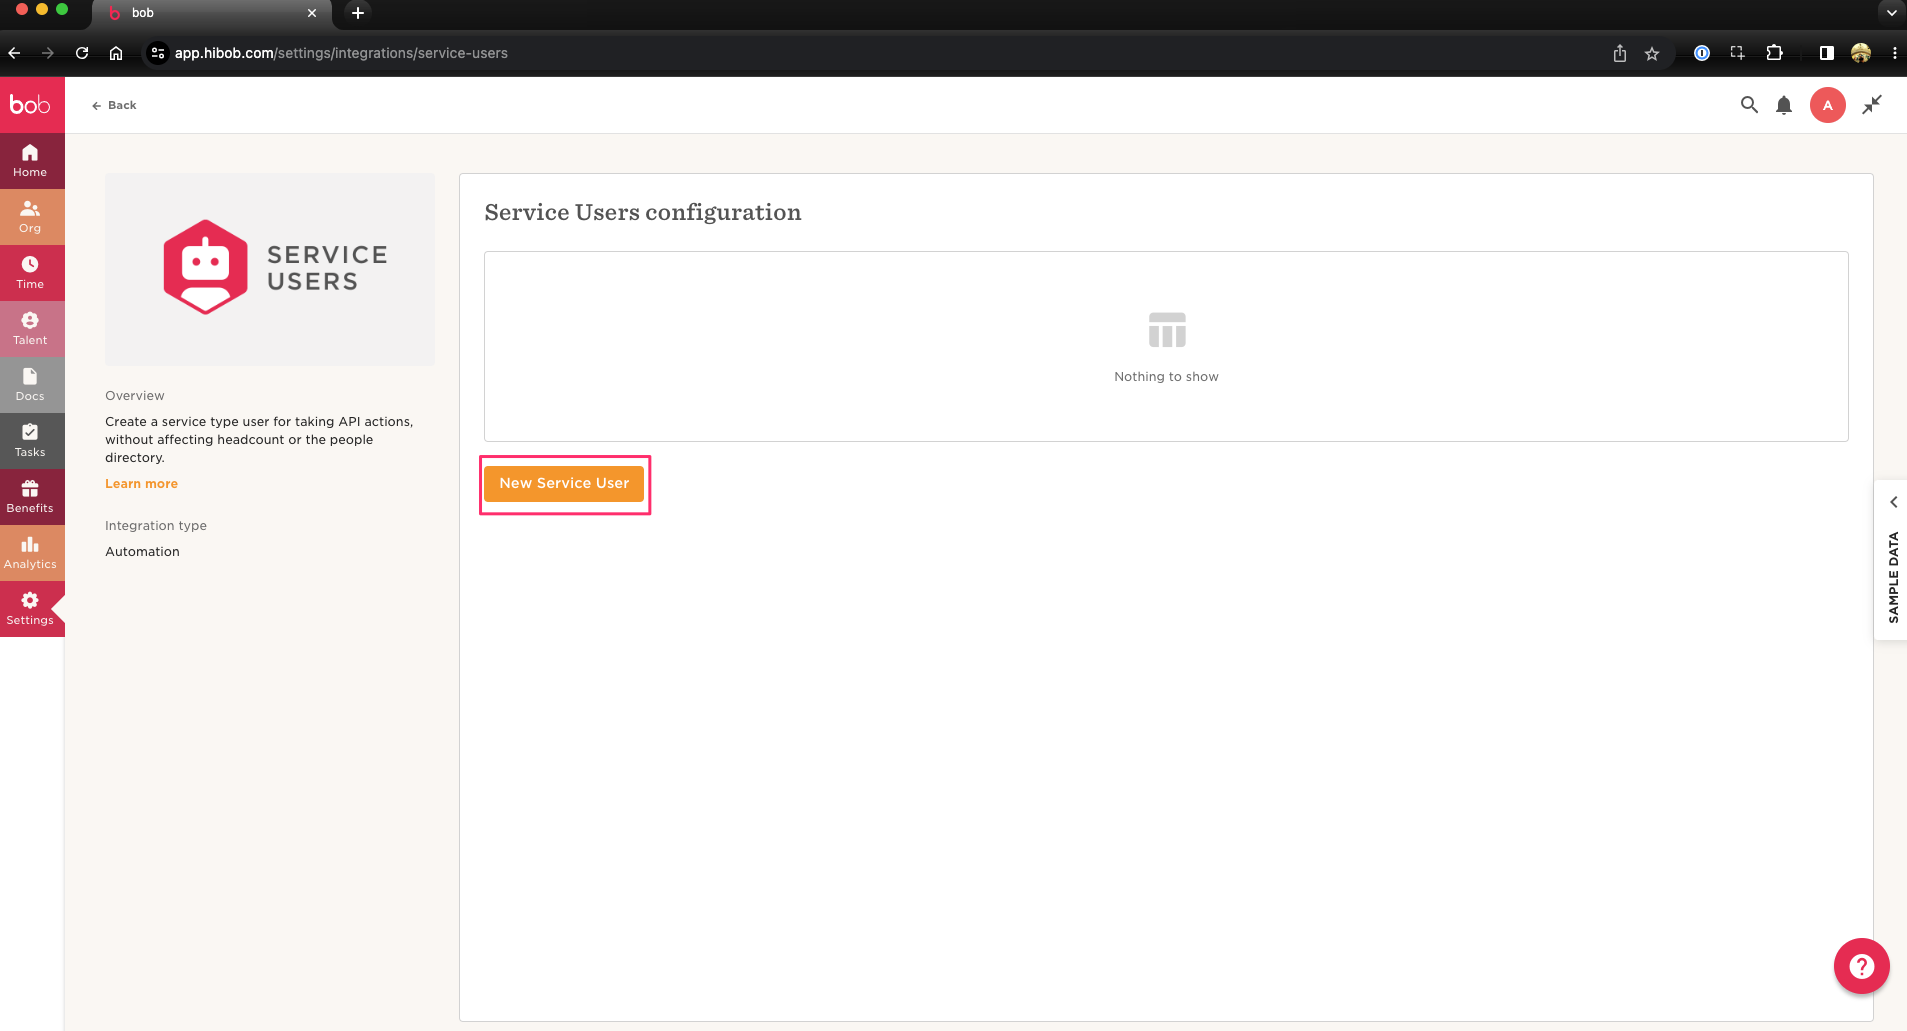
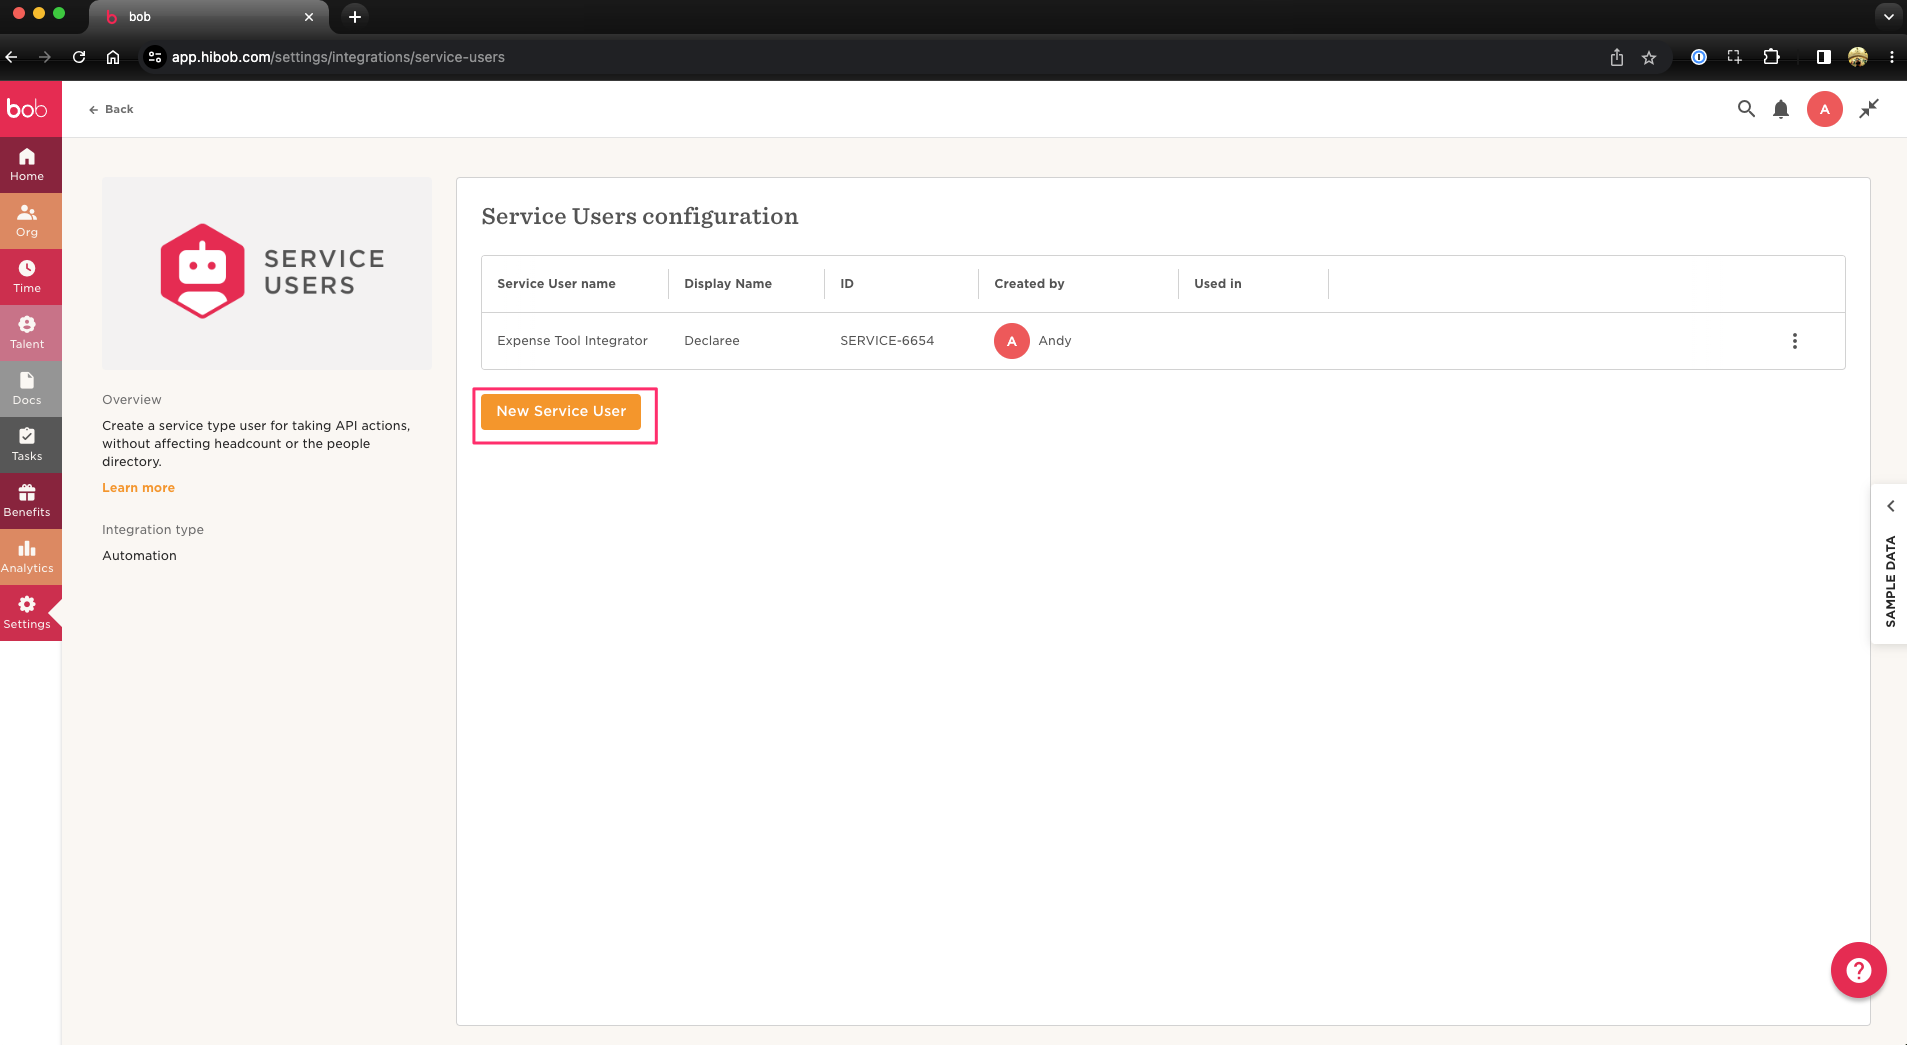
Step 1: Create a Service User in HiBob
-
Log into HiBob as an Administrator.
-
In the left sidebar, go to Settings → Account → Integrations.
-
In the Service Users section, click Connect.
-
Click New Service User to create a new user.
-
Enter a unique name and display name.
-
Click Next to continue.

-
-
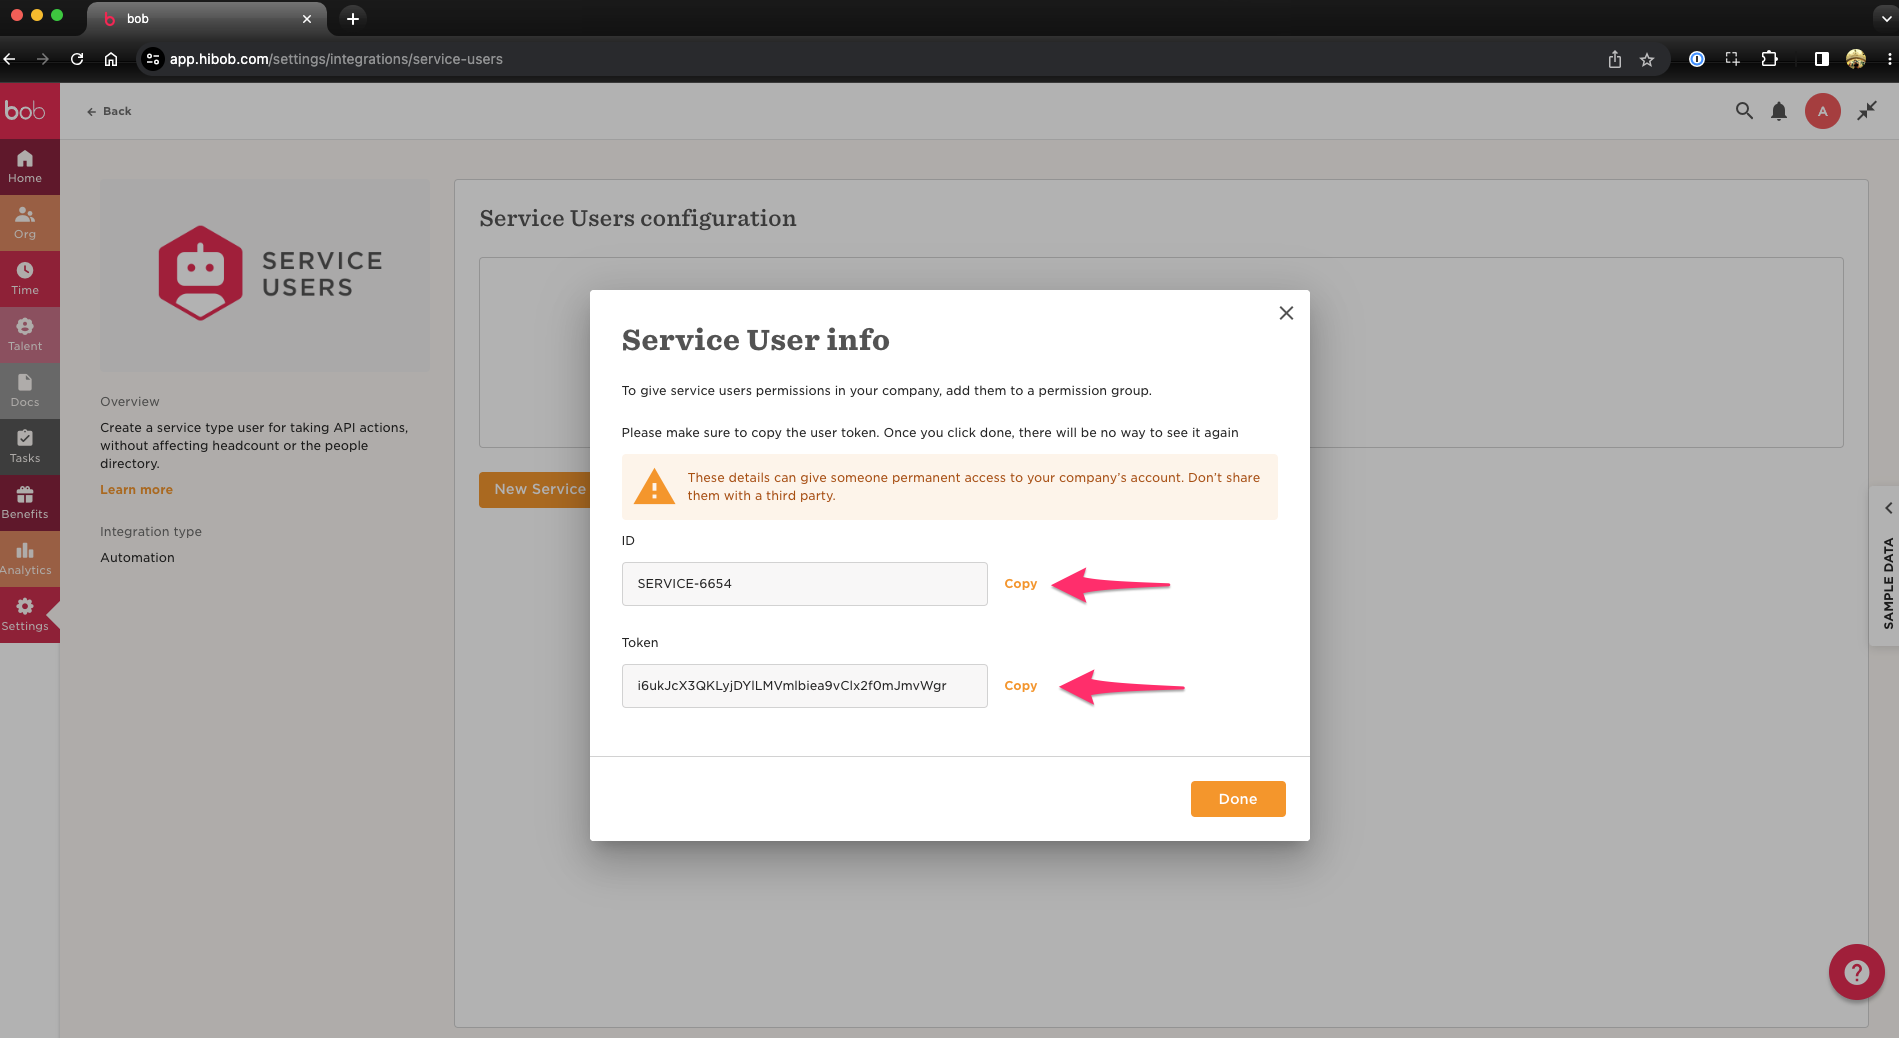
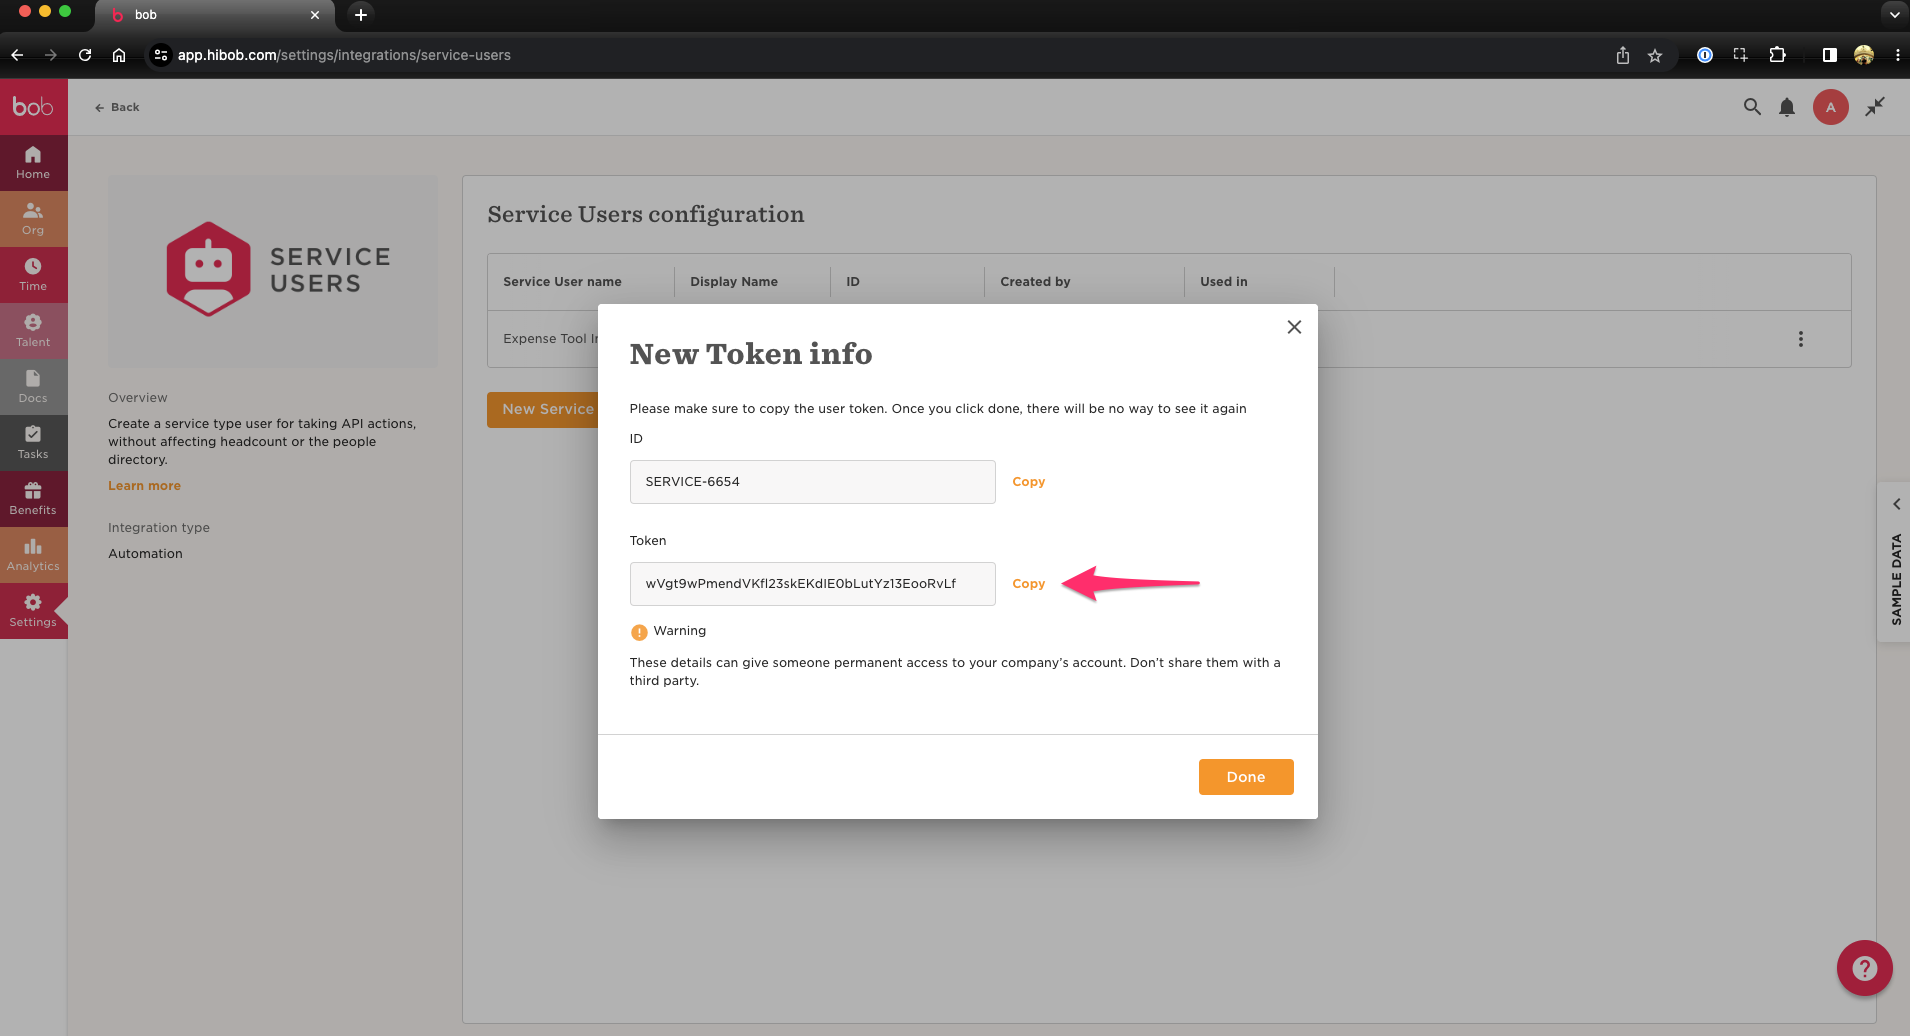
After creating the user, copy and store the Service ID and Token in a safe place.
You’ll need these credentials to link HiBob with Declaree’s API.
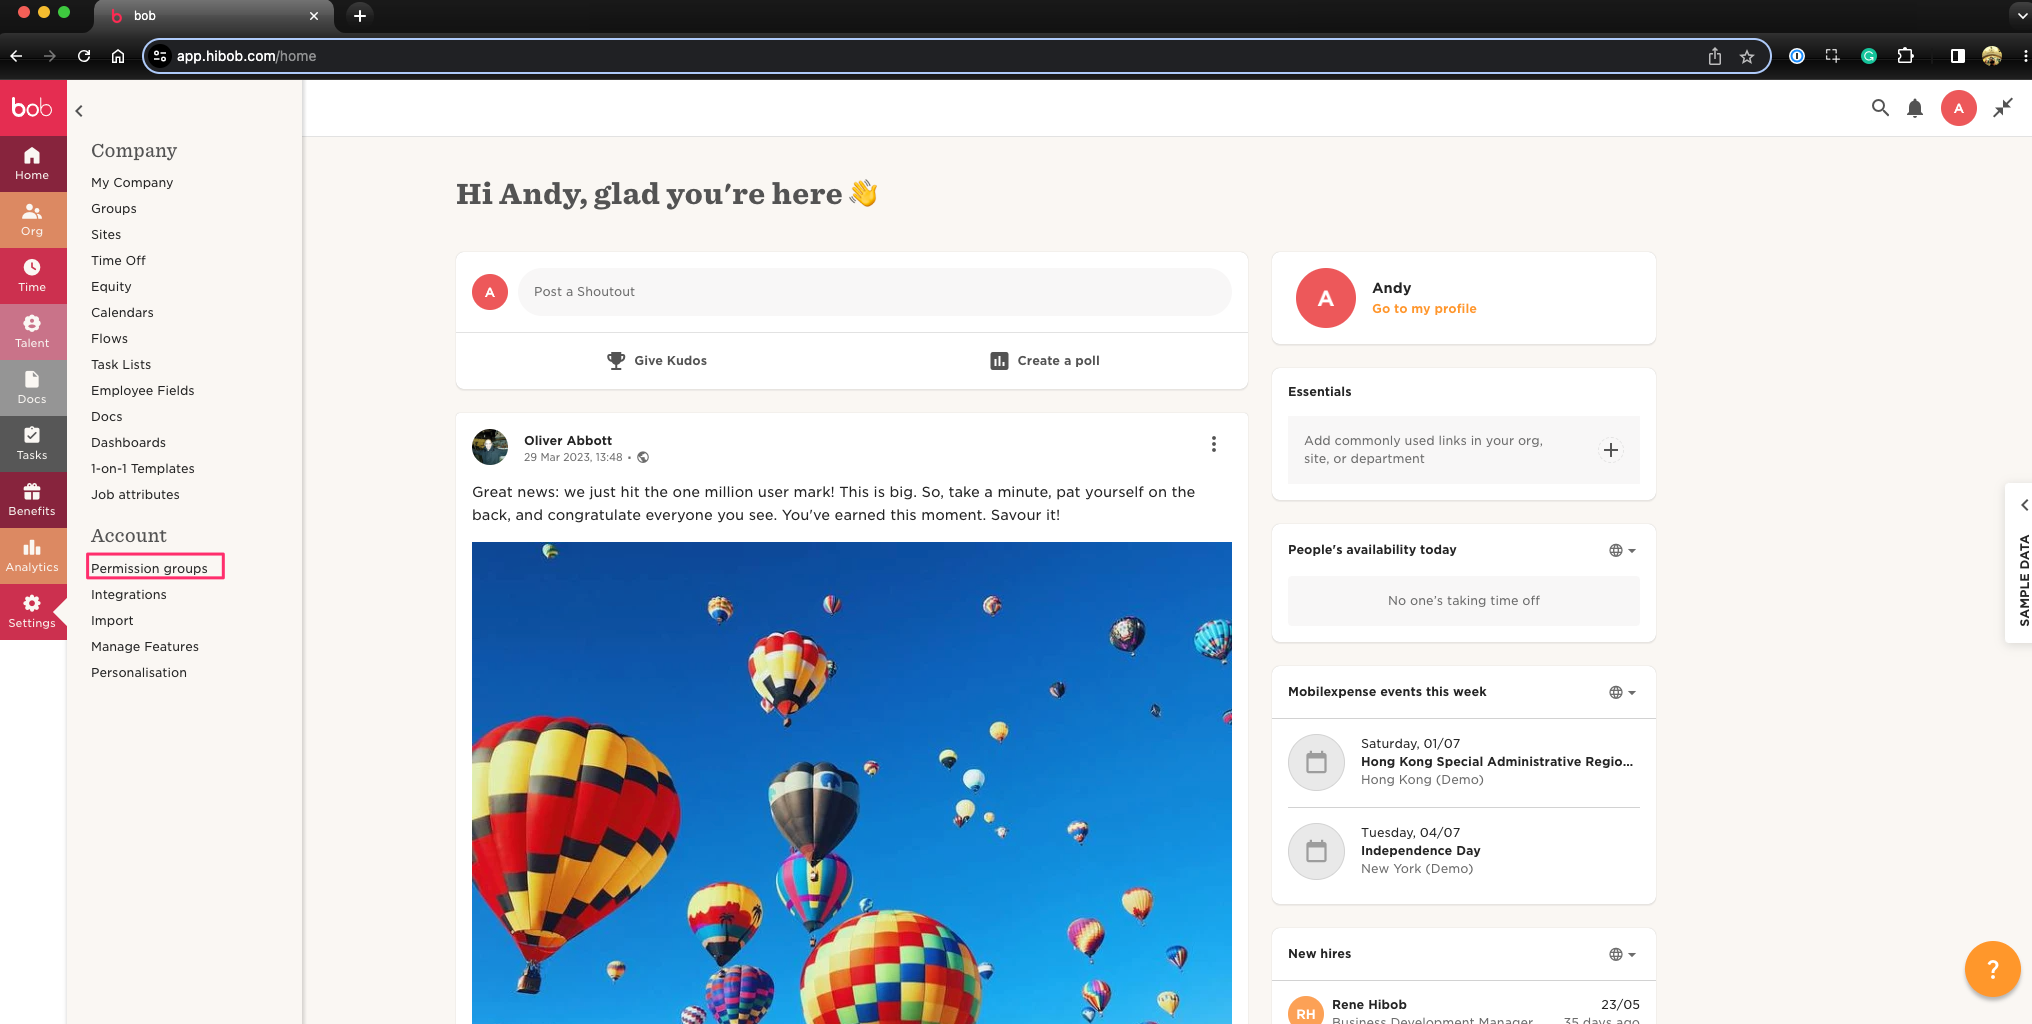
Step 2: Set Permissions for the Service User
-
In the Settings menu, navigate to the Permission Groups tab.
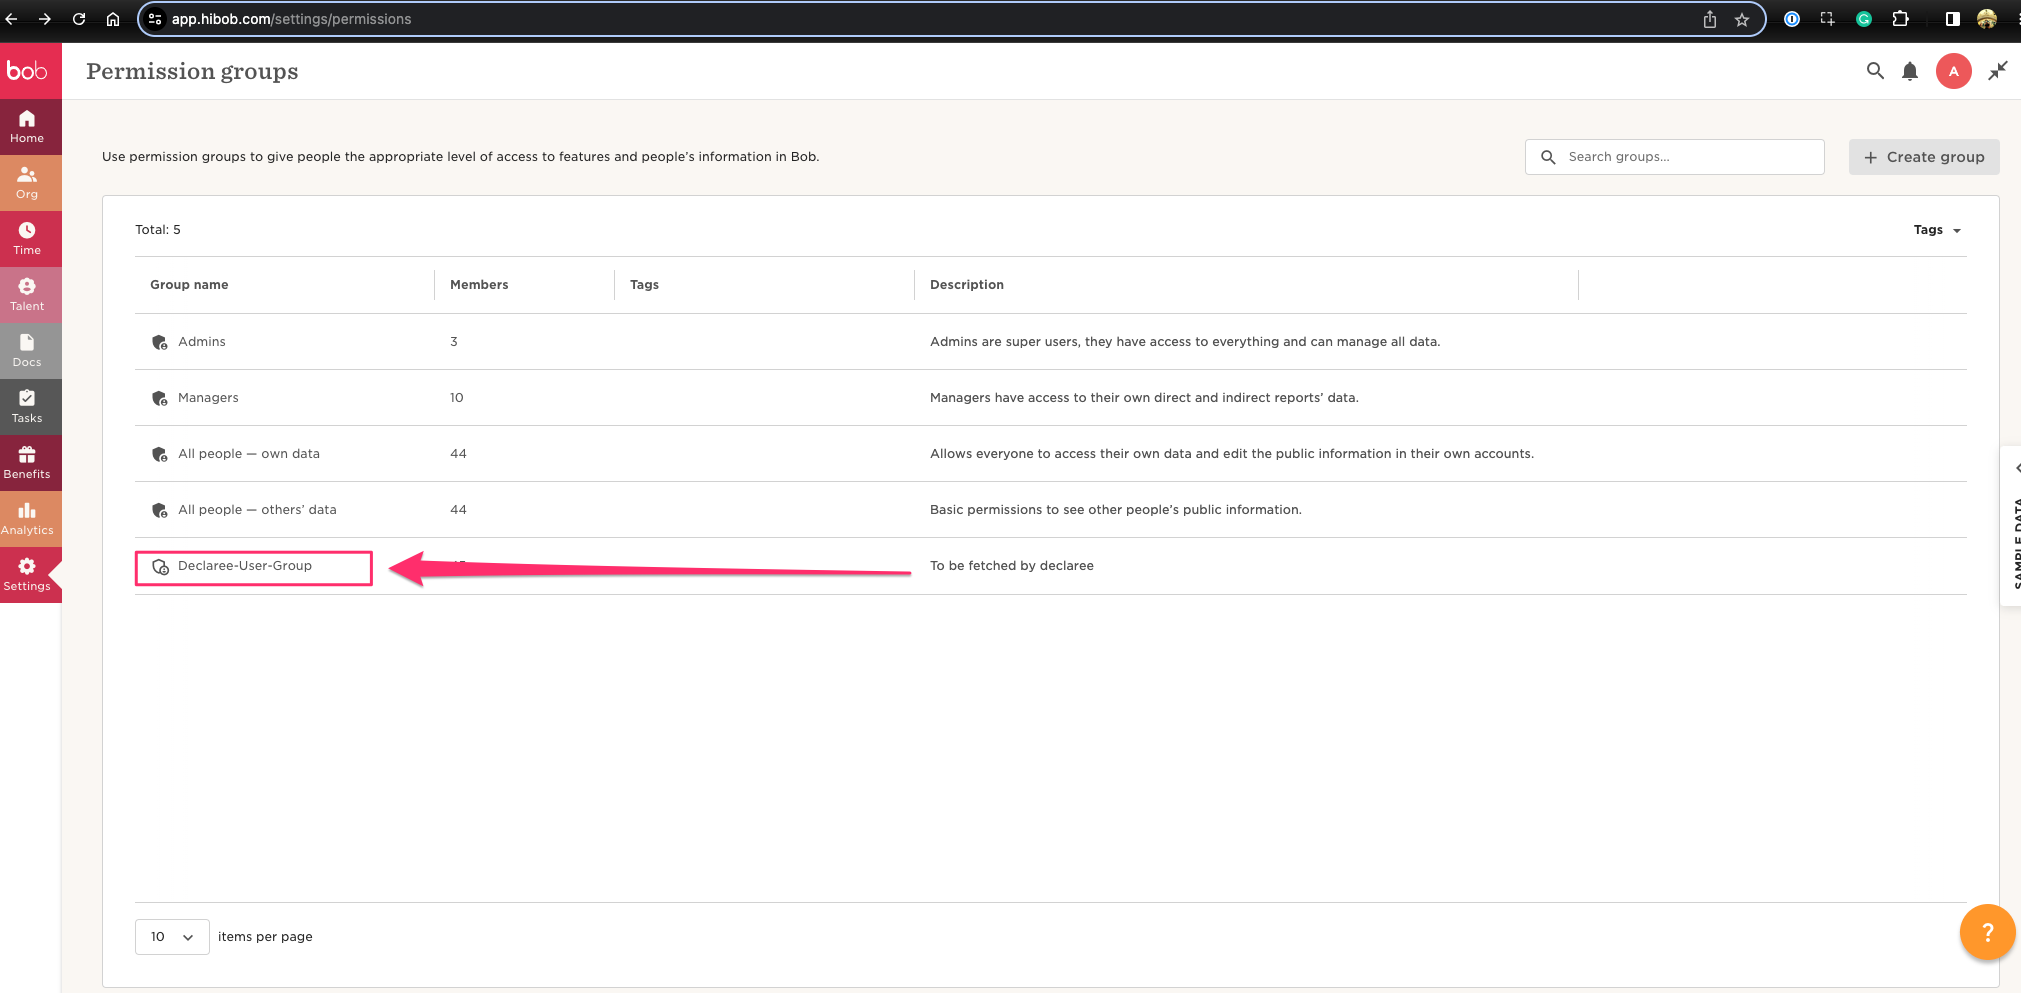
-
Create a permission group with REST API access enabled.Please follow the process explained in Bob’s Help Center: Create a custom permission group
-
Ensure that the box for Manage REST API Token is checked, as described in HiBob’s Help Center.

-
Once a permission group has been created, click on the relevant group.
-
In the permission group page, click on the “Group actions” button.
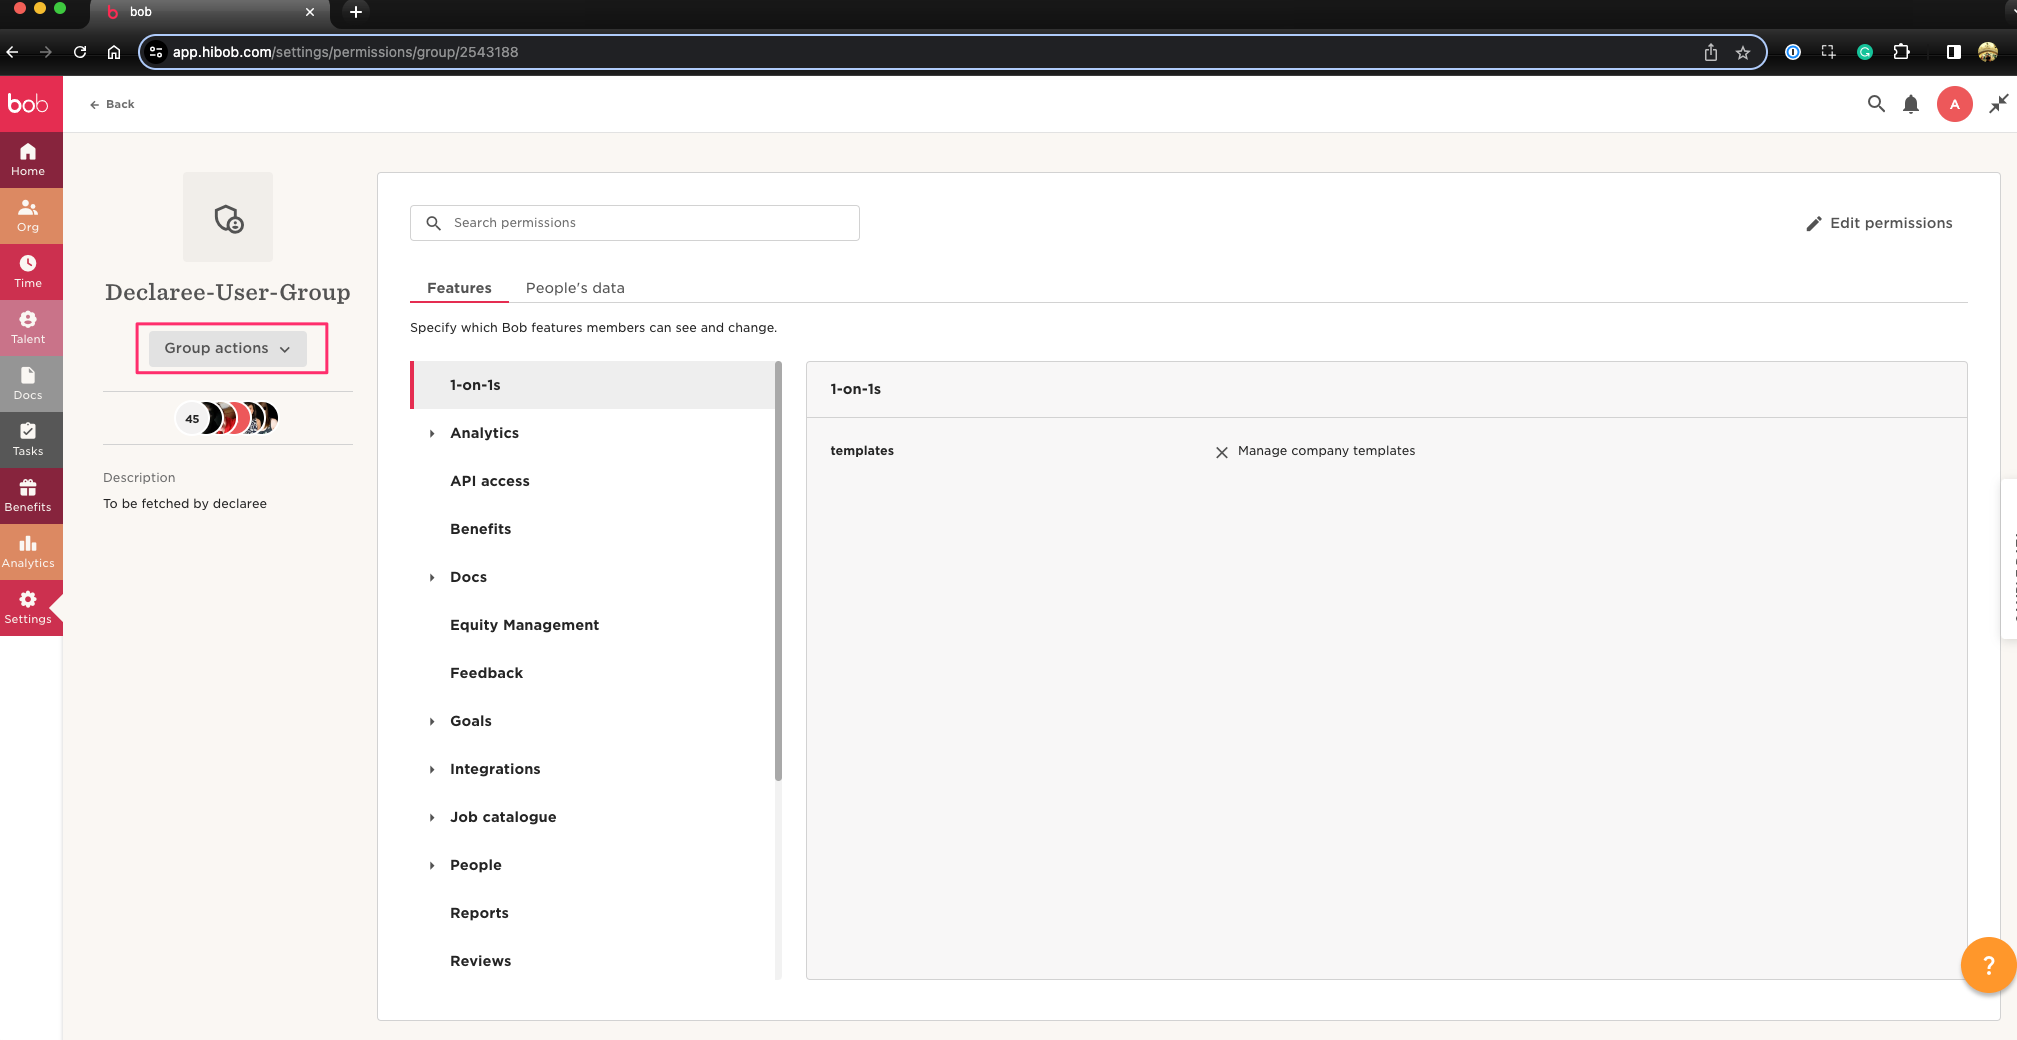
-
In the “Group actions” menu click on “Edit details”.

-
In the details page of the selected permission group select the option “Select people by condition if it has not been already selected.
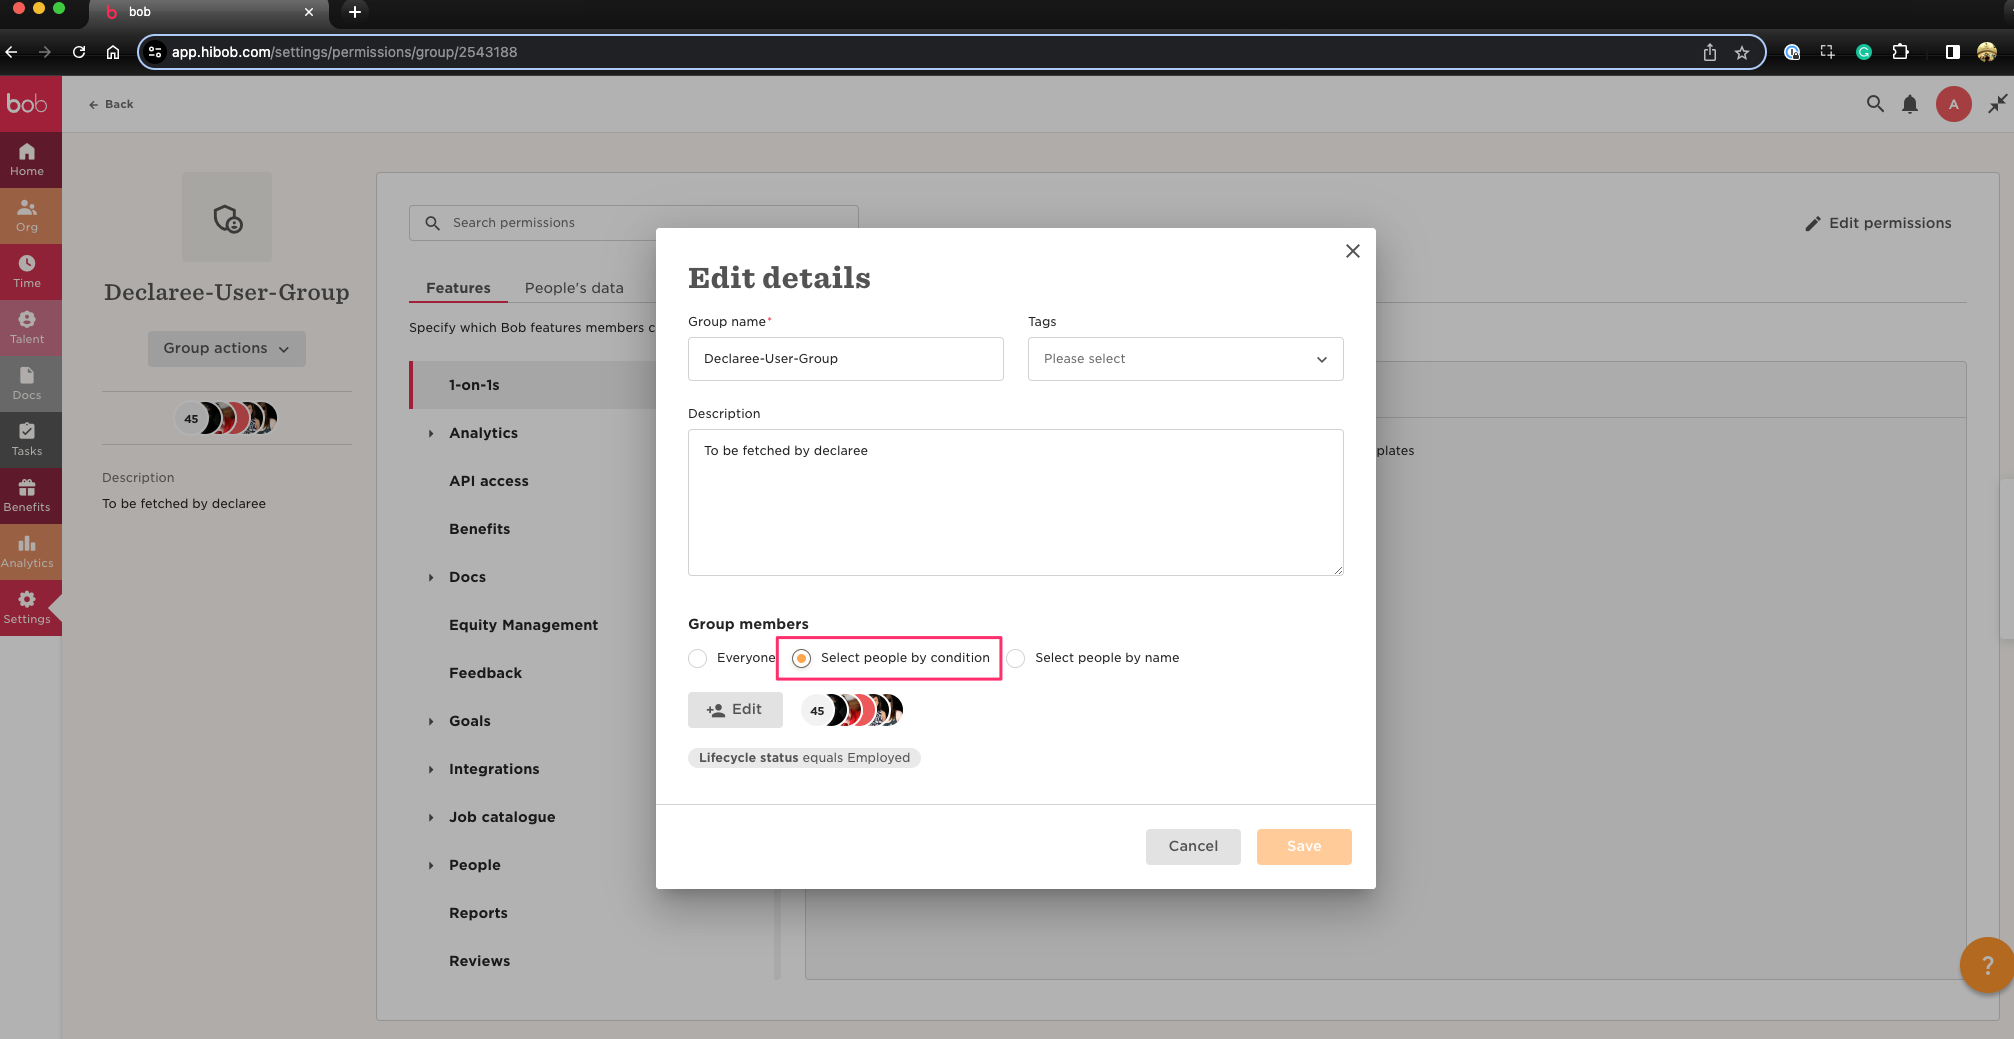
-
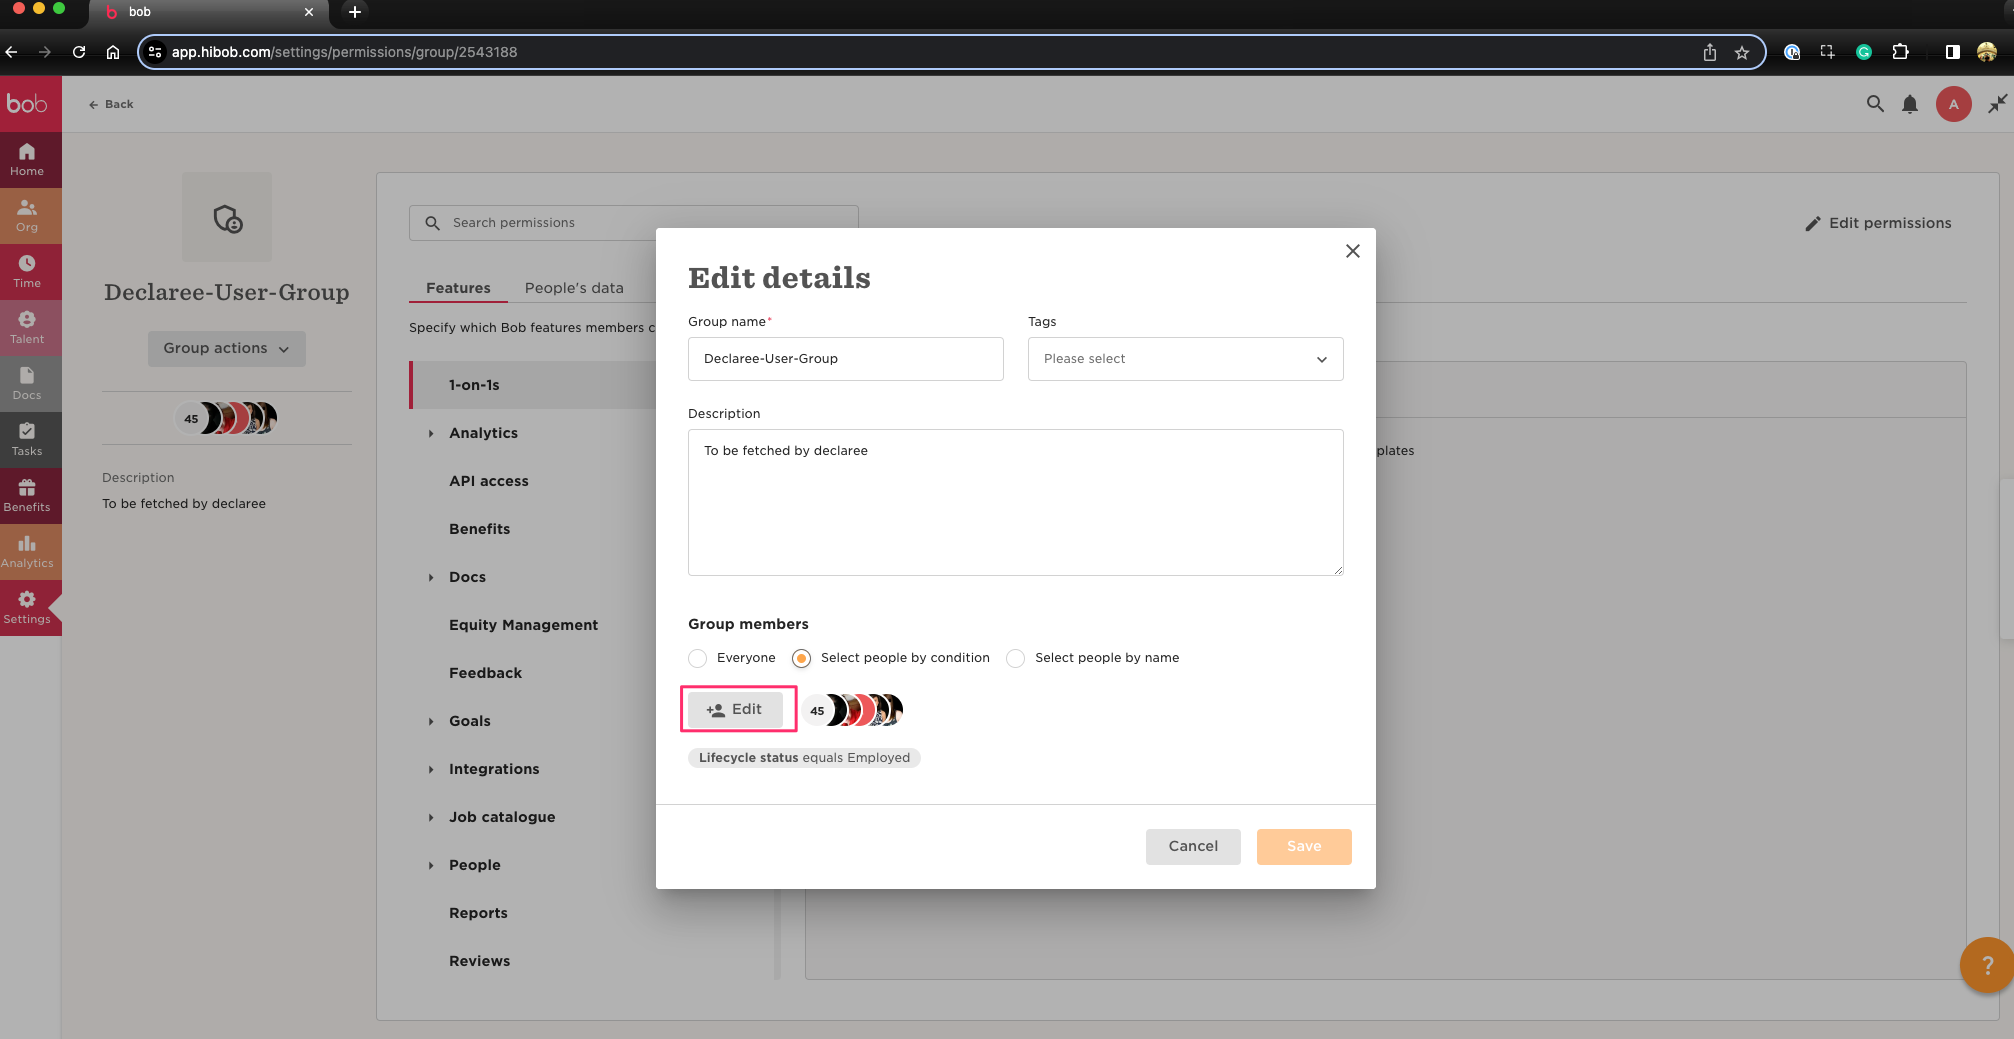
Next, click on the “Edit” button to add the newly created service users.
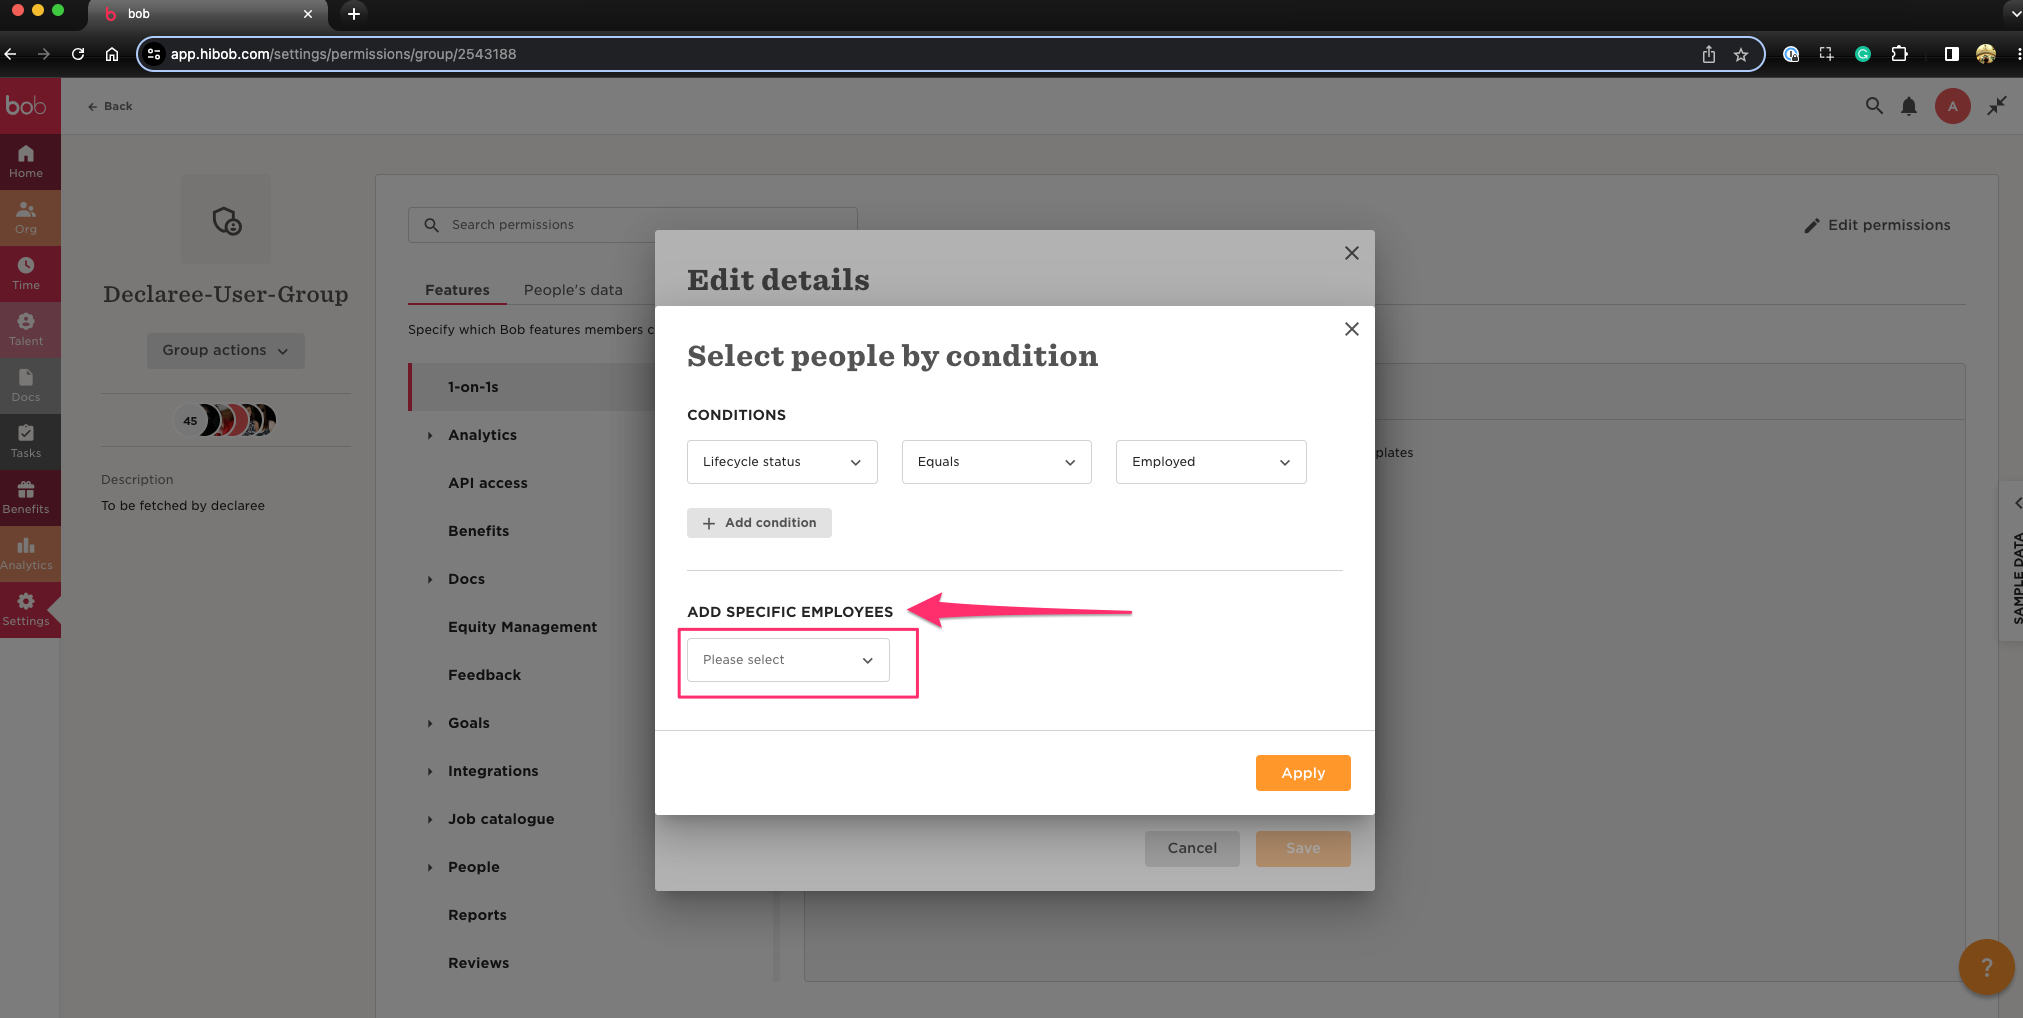
-
A pop up will appear to select employees or service users, go to the “Add specific employees” section and click on the dropdown.
-
In the dropdown, select the checkbox “Service Users” and confirm your selection by clicking on “Apply”.
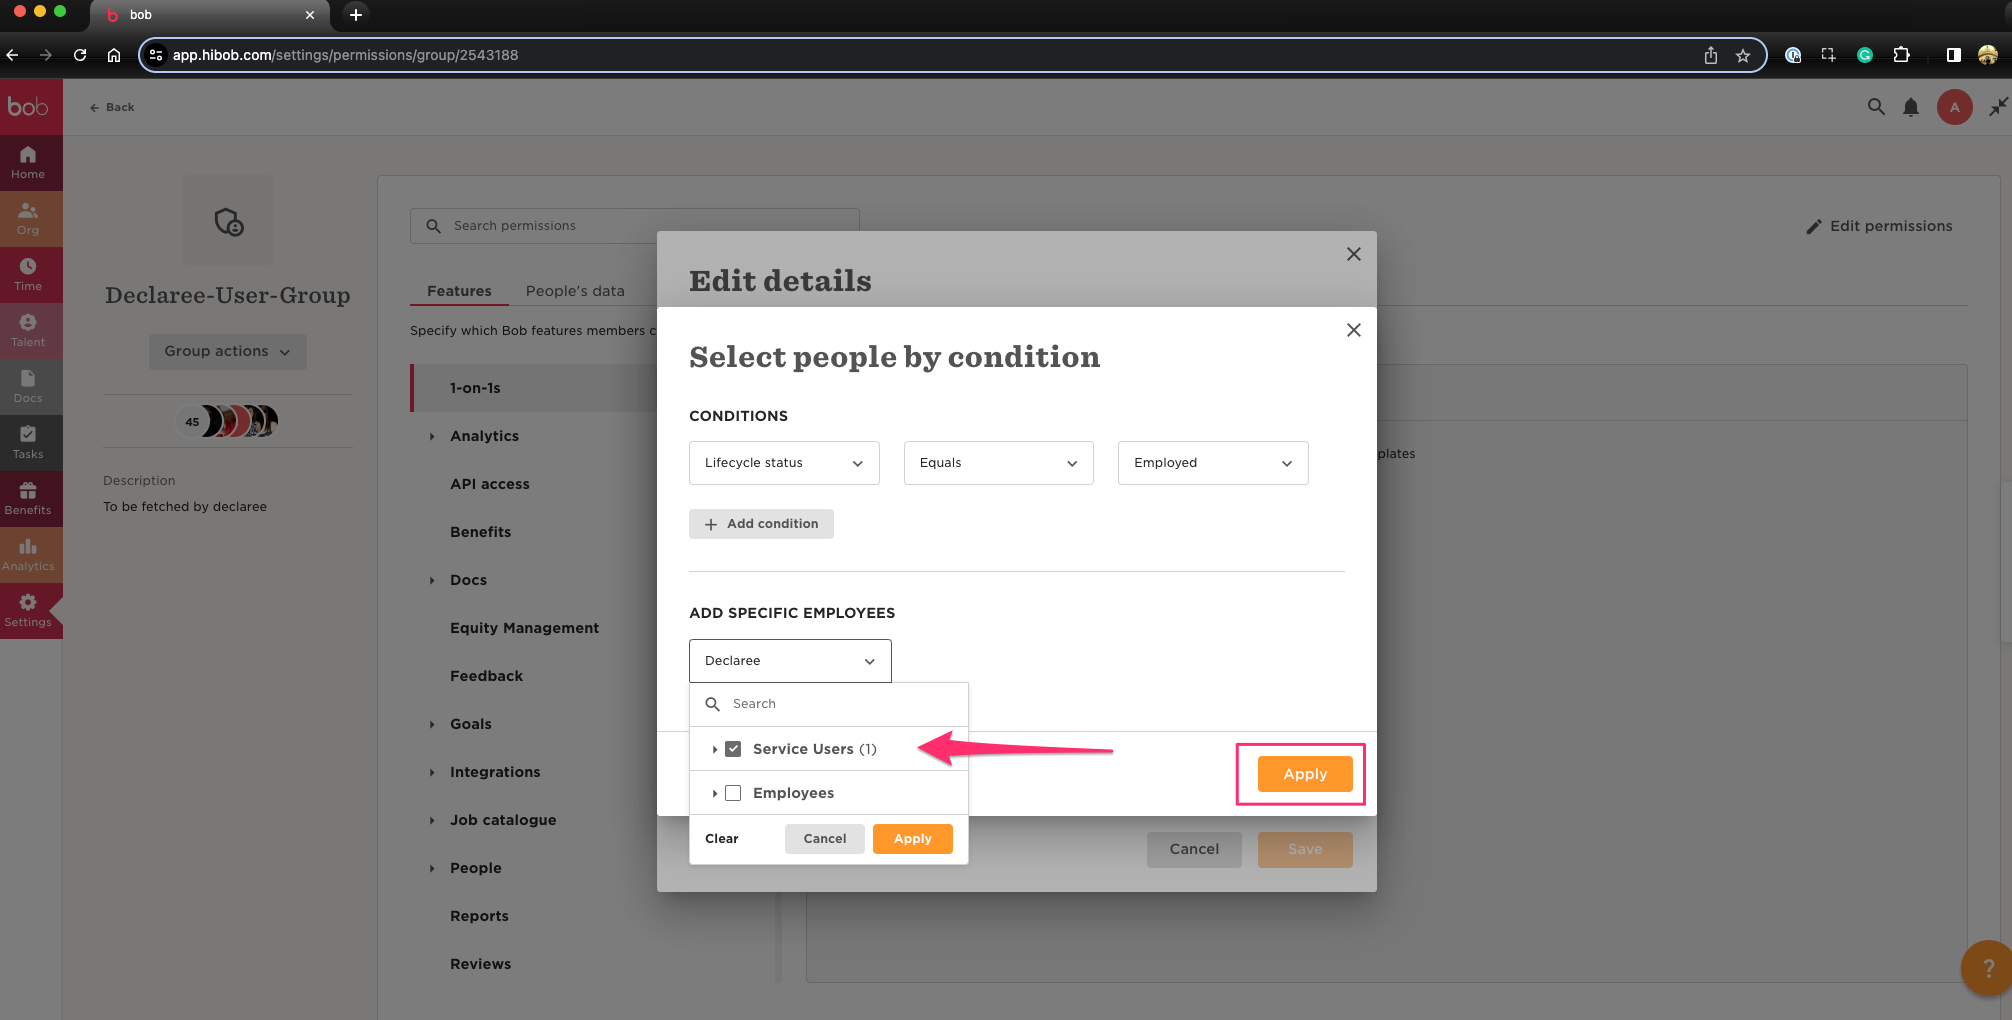
-
To finalize, confirm your changes by clicking on the “Save” button.

Step 3 (optional): Synchronizing Multiple Legal Entities
If you need to sync employees from one HiBob account into several Declaree organizations, use a custom field Legal Entity.
Setup Steps
-
Create a Legal Entity field in HiBob and assign values to employees.
-
Create one service user and permission group per entity.
-
Connect each service user to the matching Declaree organization.
Result: Only active employees from the assigned legal entity are synchronized to the correct Declaree organization.
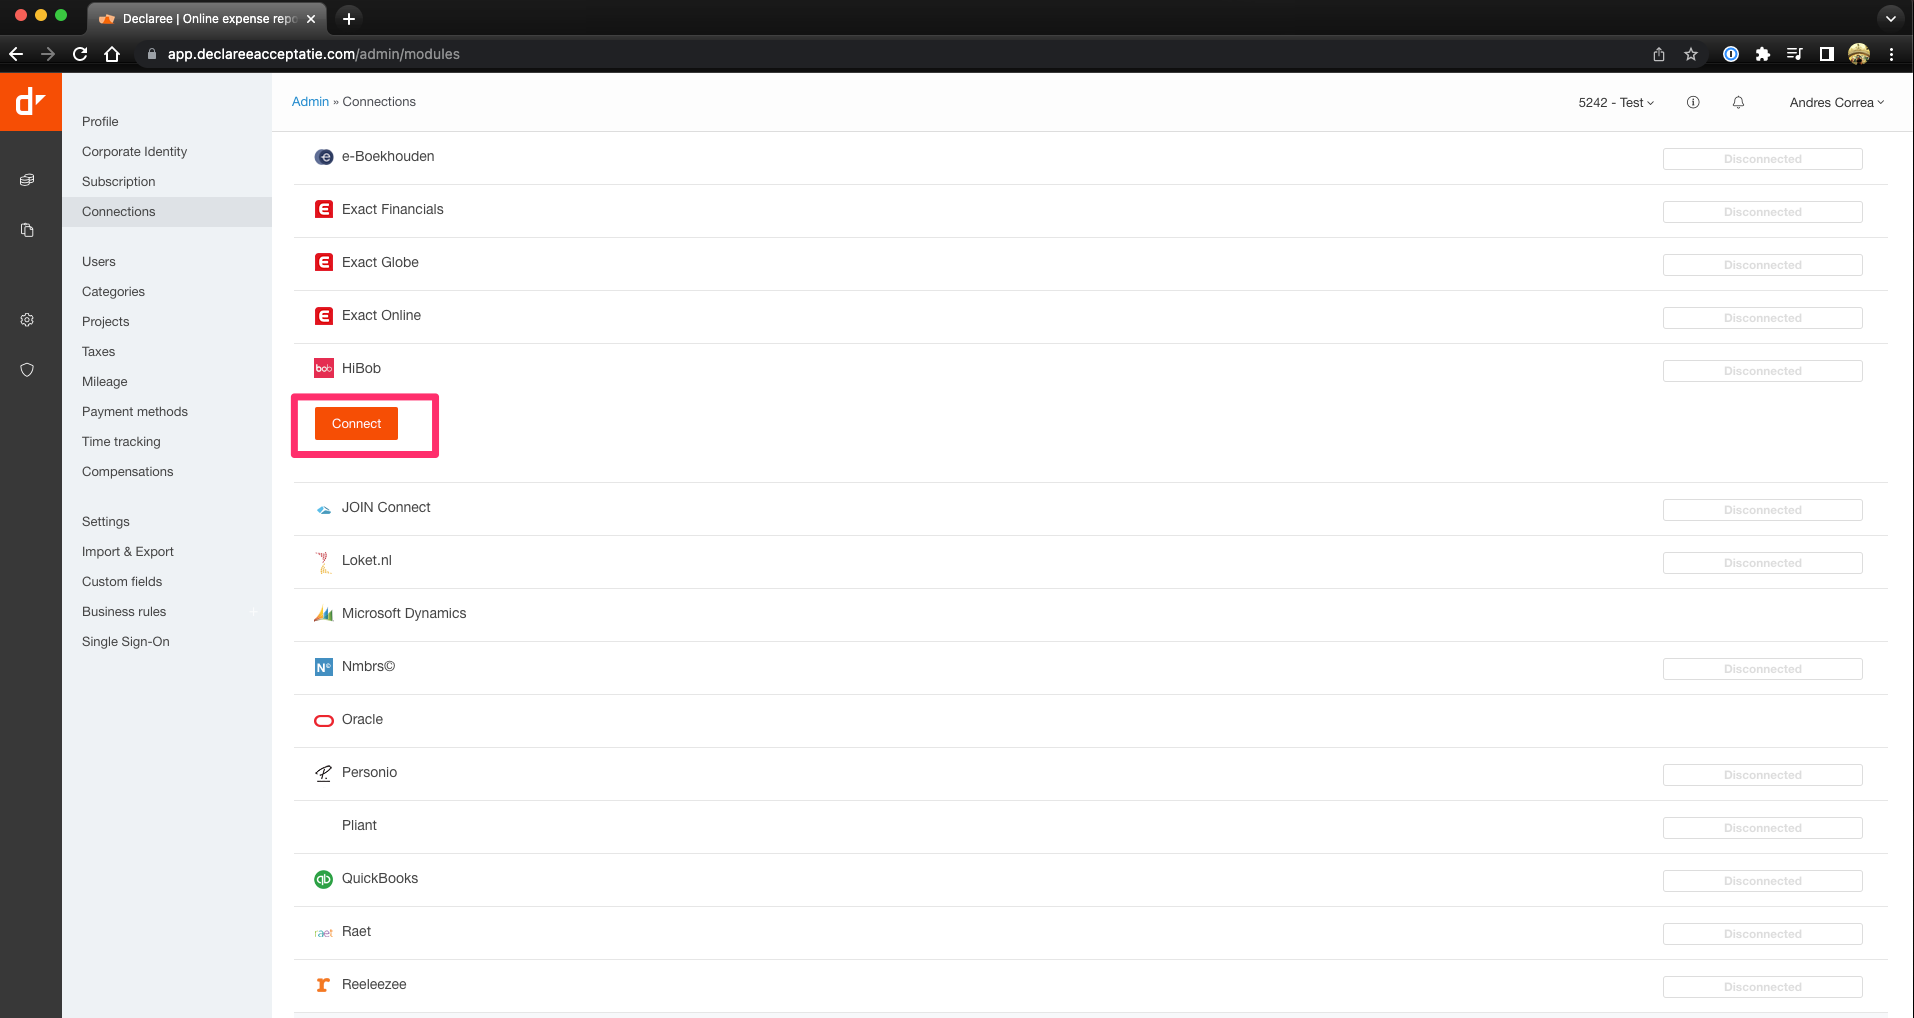
Step 4: Activate Integration in Declaree
-
Log in to Declaree as an Administrator.
-
Click on the Settings tab in the left navigation menu and go to the Connections tab.
-
Select the HiBob logo and click Connect to initiate the activation.
-
In the pop-up, enter the Service ID and Token you obtained from HiBob.
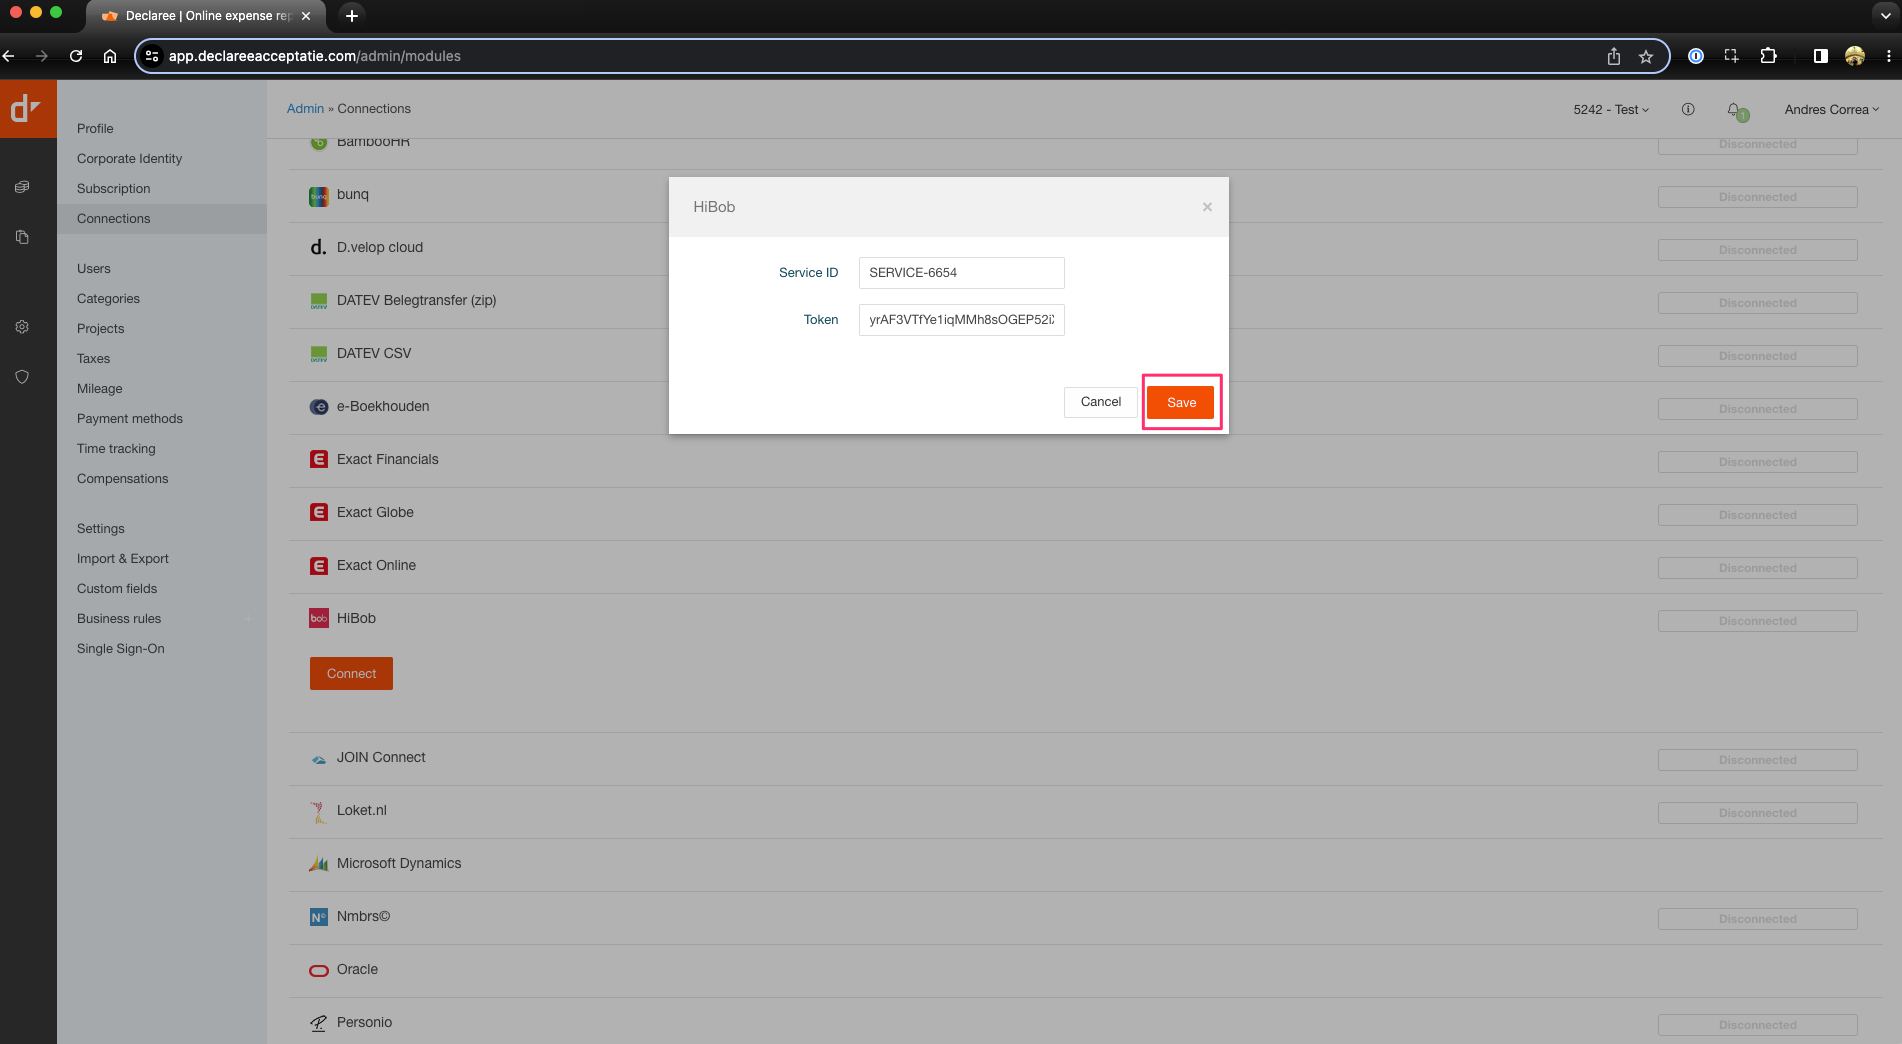
-
Click Save to complete the integration.
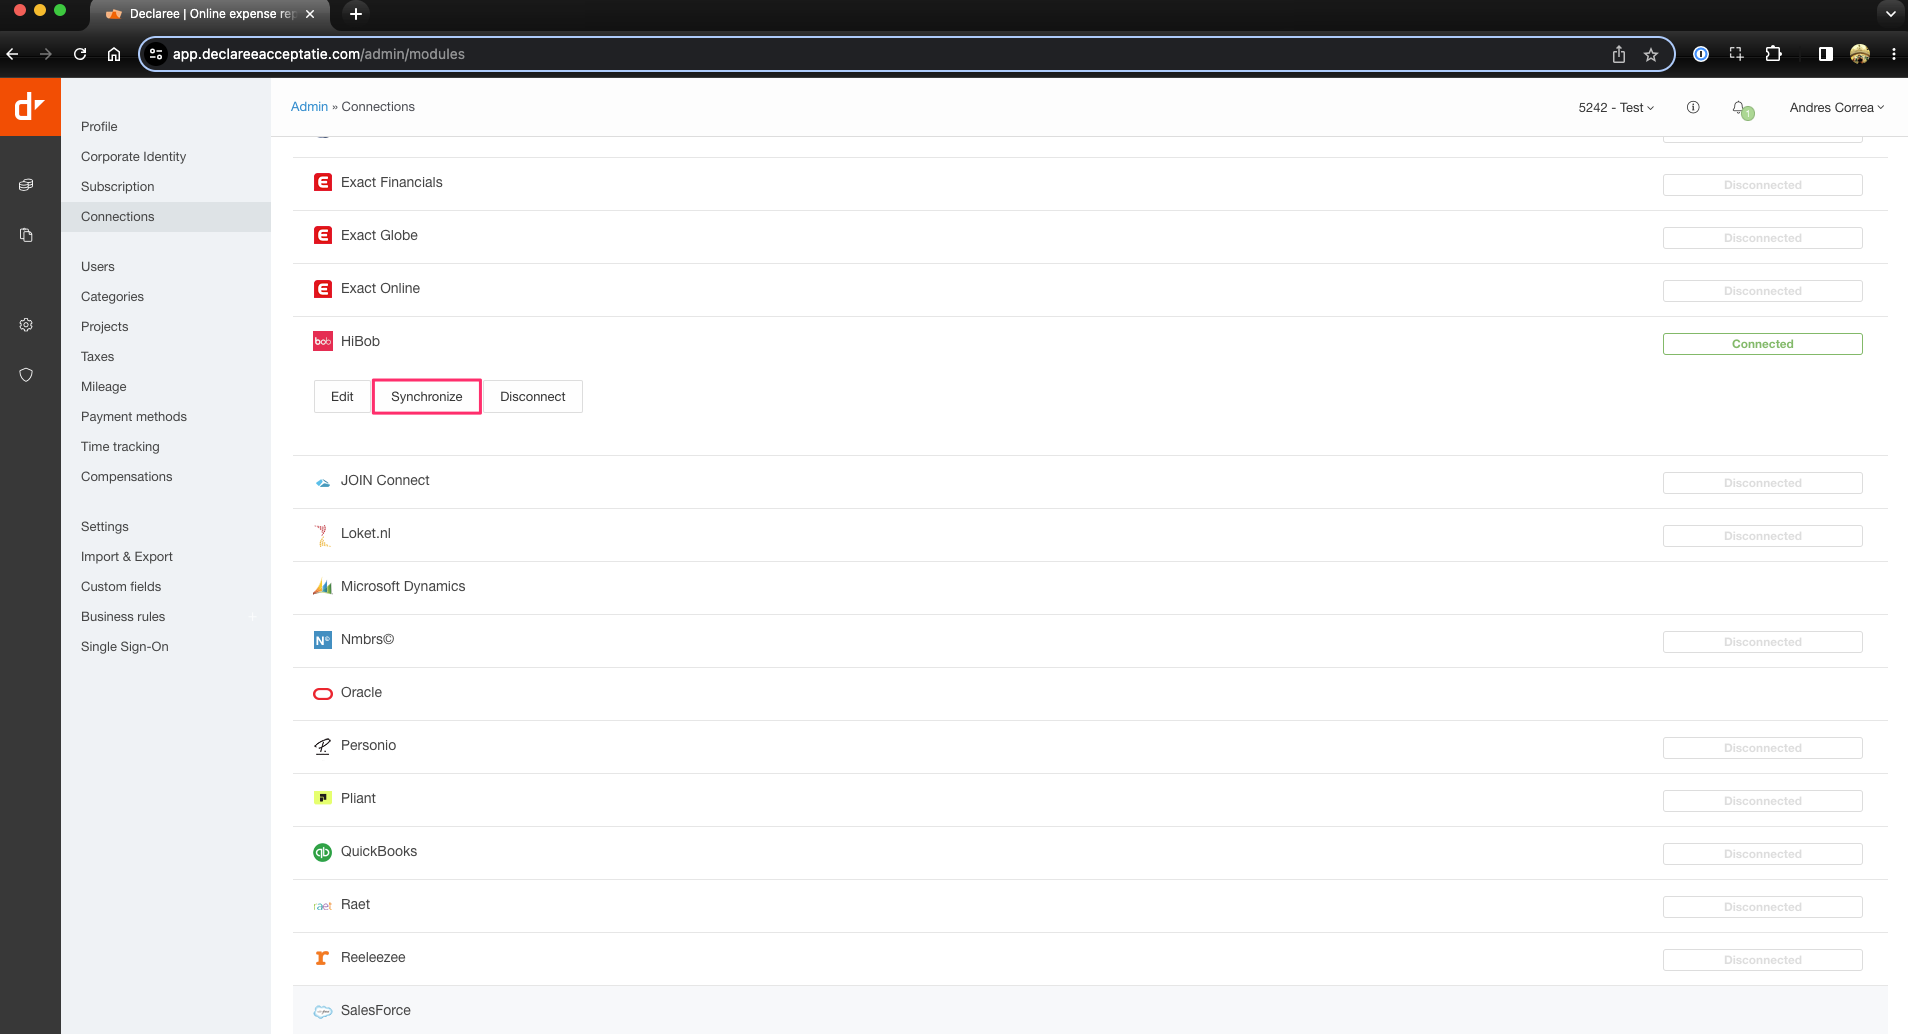
-
You can trigger an initial user import by clicking on the “Synchronize” button, or wait for the next automatic synchronization done by Declaree.
Step 5: Synchronization
Once the integration is established, Declaree will automatically synchronize user data from HiBob. The integration performs two API calls daily:
-
The first call retrieves employee data in the morning.
-
The second call updates any changes in the evening, ensuring that user profiles in Declaree are accurately reflected.
This ensures that your data is always up-to-date without the need for manual updates.
Managing Service Users & Refreshing Tokens
-
You can always manage your service users or create new ones on the Service Users page in HiBob.
-
If you ever need to refresh your access token, navigate to the Service Users page.
-
Click the three-dot icon on the left side of your service user.
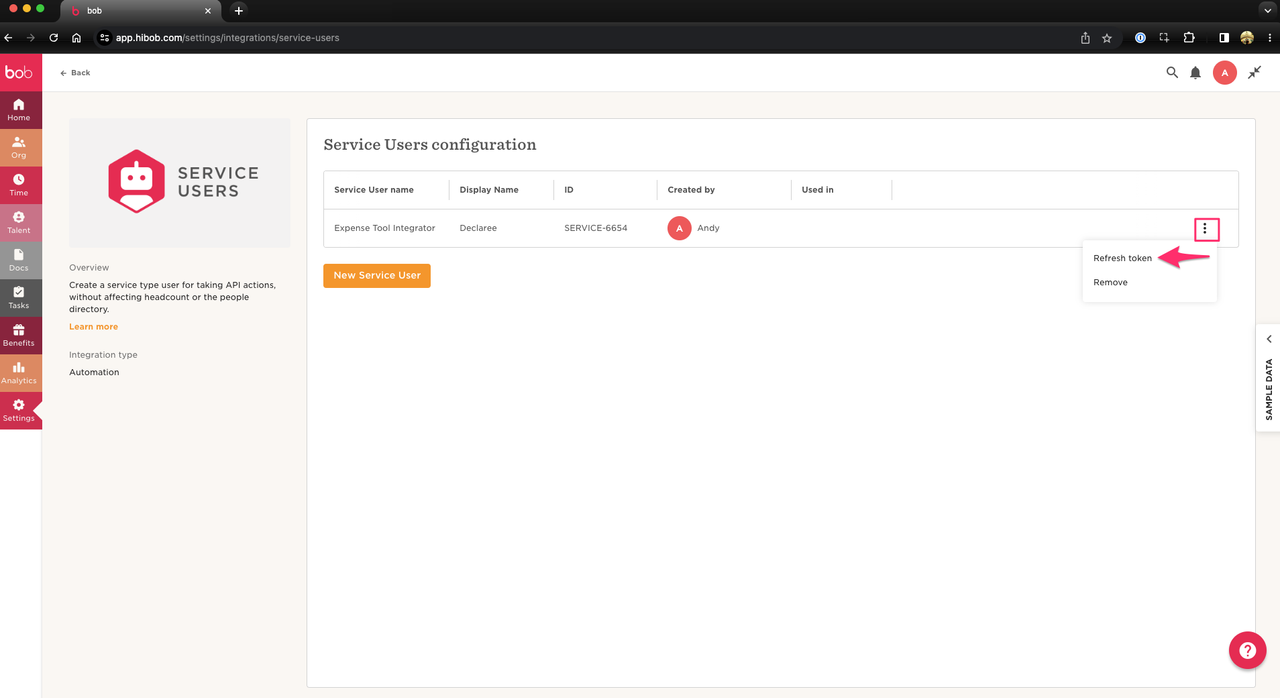
-
-
A pop-up window will appear, displaying a new Token.
✅ Best Practice Tip
After setup, always validate a few synced users in Declaree to make sure:
-
Names and email match exactly
-
Their account is activated
-
Their manager (if applicable) is correctly linked