
This guide explains how to configure Microsoft Entra ID (formerly Azure Active Directory) provisioning with Declaree using the SCIM protocol.
Requirements
Before you begin, ensure the following prerequisites are met:
-
Dedicated Administrative Account
-
Create a dedicated user account with administrative privileges for provisioning.
-
If your organization has multiple entities, add this account to the parent organization. This will be the default for provisioned users.
-
-
Unique Group Names
-
Ensure group names are unique. Duplicate names may prevent groups from syncing correctly.
-
Step 1: Retrieve Information from Declaree
-
Log into Declaree as an administrator (preferably the dedicated account).
-
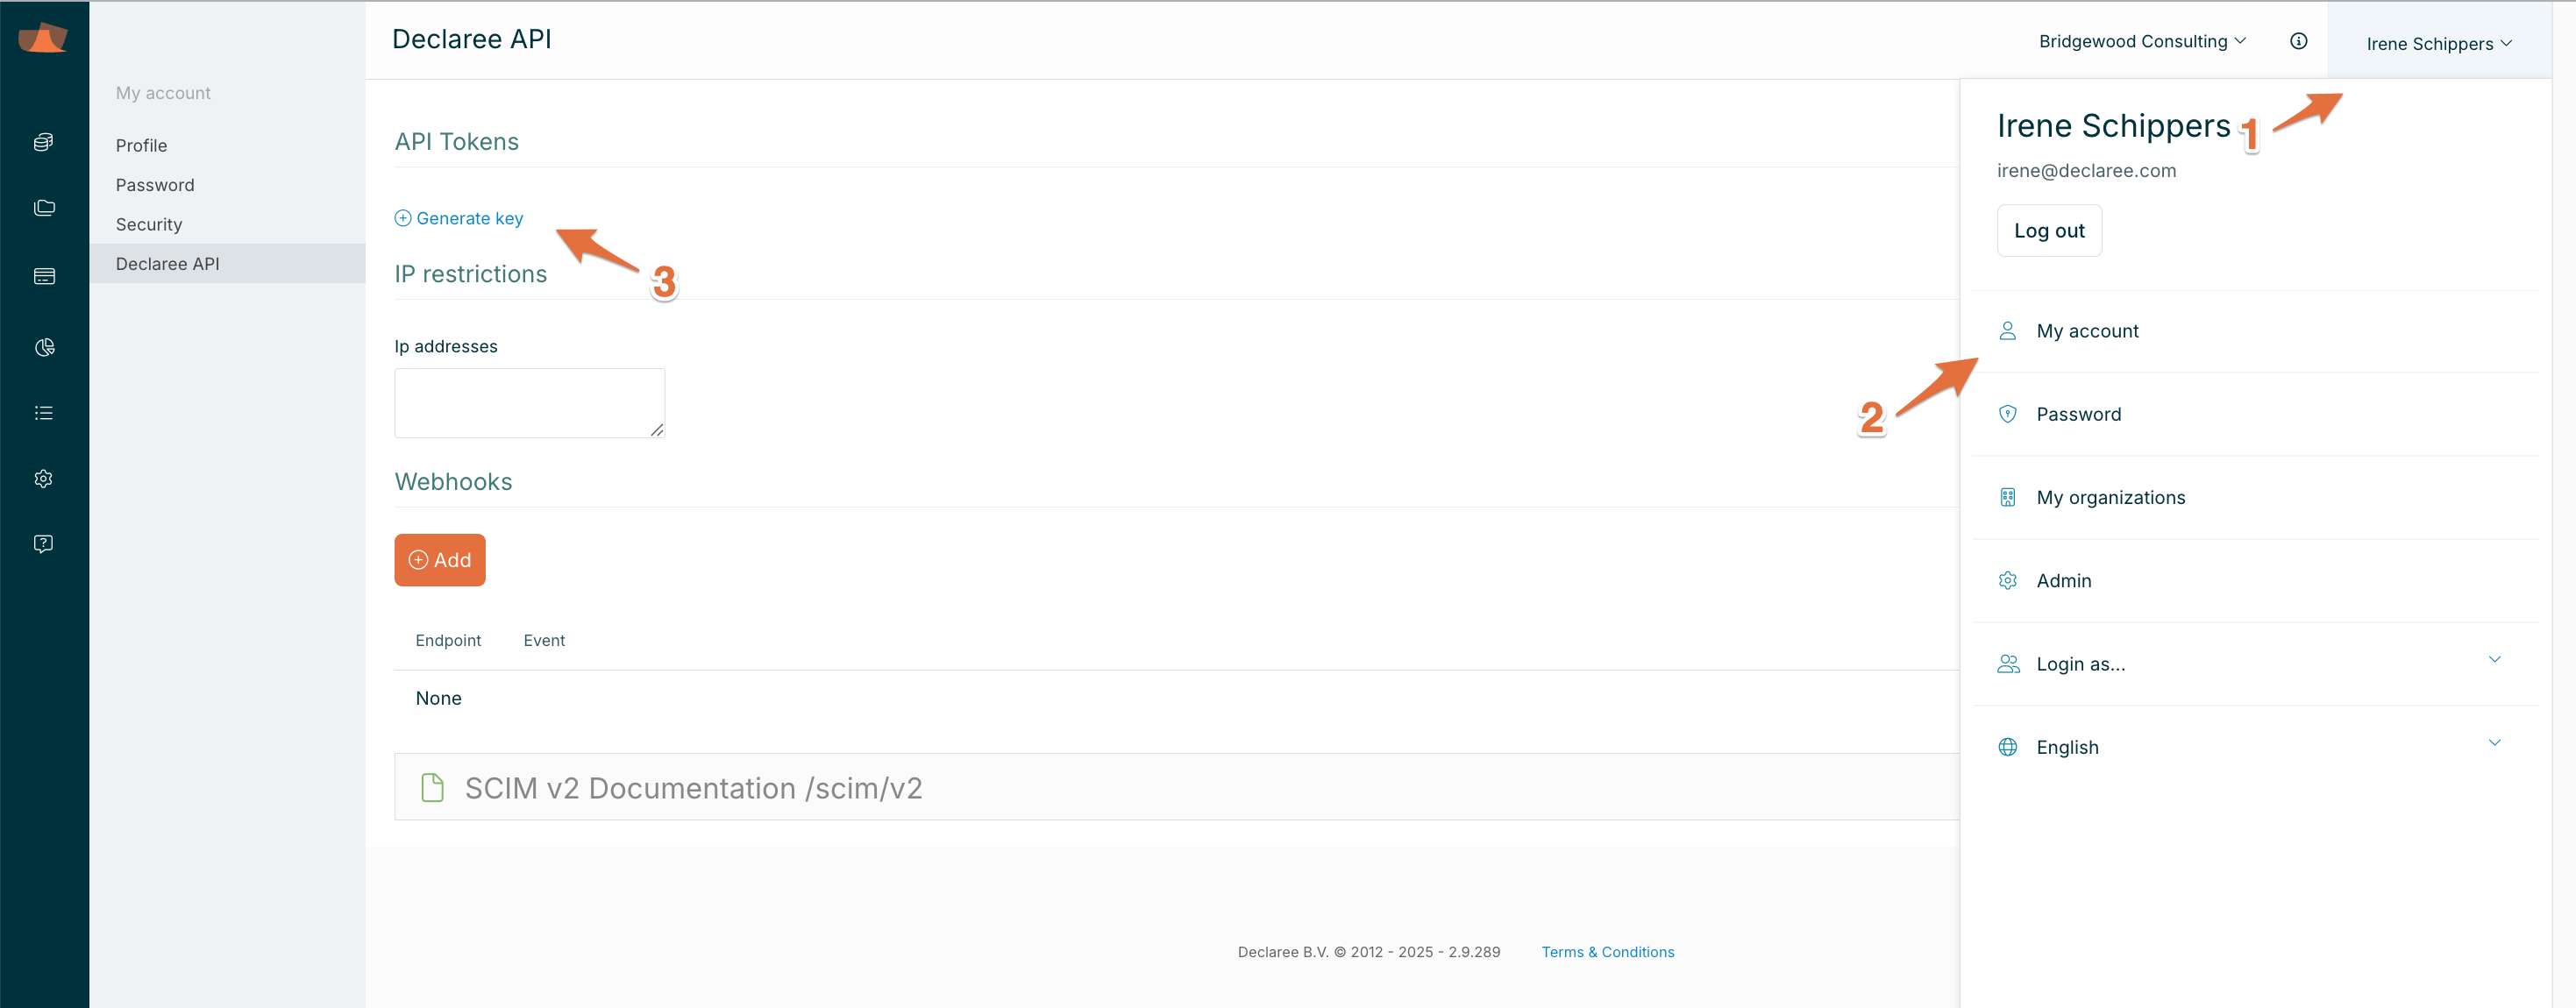
Go to My Account (click your name in the top-right corner).
-
Open the Declaree API tab.
-
Click Generate Key and copy the key for later use.
Step 2: Configure Microsoft Entra ID
-
Log into Microsoft Entra Admin Center:
-
Access the Microsoft Entra admin center.
-
-
Search for Entra ID:
-
Perform a search for "Entra ID" and select Microsoft Entra ID from the results.
-
-
Navigate to Enterprise Applications:
-
In the left-hand navigation menu, click on Applications and then select Enterprise Applications.
-
-
Create a New Application:
-
Click on New Application.
-
If you’ve already set up Single Sign-On (SSO) for Declaree, locate your existing Declaree app and skip to step 8.
-
-
Name and Configure the Application:
-
Click on Create your own application.
-
Name your application and select Integrate any other application you don't find in the gallery (Non-gallery).
-
-
Provision User Accounts:
-
In the new application, select Provision User Accounts.
-
Click on Get started.
-
-
Configure Provisioning Mode:
-
Select Automatic provisioning mode.
-
In the Tenant URL field, enter one of the following:
-
https://app.declaree.com/SCIM/v2/ -
https://app.declaree.de/SCIM/v2/
-
-
In the Secret Token field, enter the key generated in Step 1.4.
-
-
Test and Save Configuration:
-
Click on Test Connection to ensure the setup is correct.
-
Once successful, click on Save.
-
-
Edit Provisioning Mappings:
-
If needed, edit the provisioning mappings to ensure the username is correctly mapped to the mail attribute.
-
-
Activate Provisioning:
-
Turn provisioning On and click on Save.
-
Step 3: Sync Users and Groups
-
Add the users and/or groups you want to provision to Declaree.
-
Make sure group names are unique (see requirements).
Next Steps
Your Microsoft Entra ID provisioning with Declaree is now active. Users and groups will sync automatically based on your configuration.
If you run into issues, check the provisioning logs in Entra or contact Declaree Support.