
Integrating Personio with Declaree streamlines your HR and expense management workflows. With this connection, employee profiles created in Personio are automatically synced to Declaree every 15 minutes.
This article guides you step-by-step through setting up the integration, importing additional data, managing sub-administrations, and giving supervisors access across multiple Declaree environments.
How the Integration Works
Once you connect Personio to Declaree:
-
New employee profiles created in Personio will automatically be added to Declaree.
-
Data syncs every 15 minutes to keep both platforms aligned.
-
Standard employee fields are imported by default, with the option to map custom fields as needed.
💡 Important: Only employees with an “Active” status in Personio will be synced to Declaree.
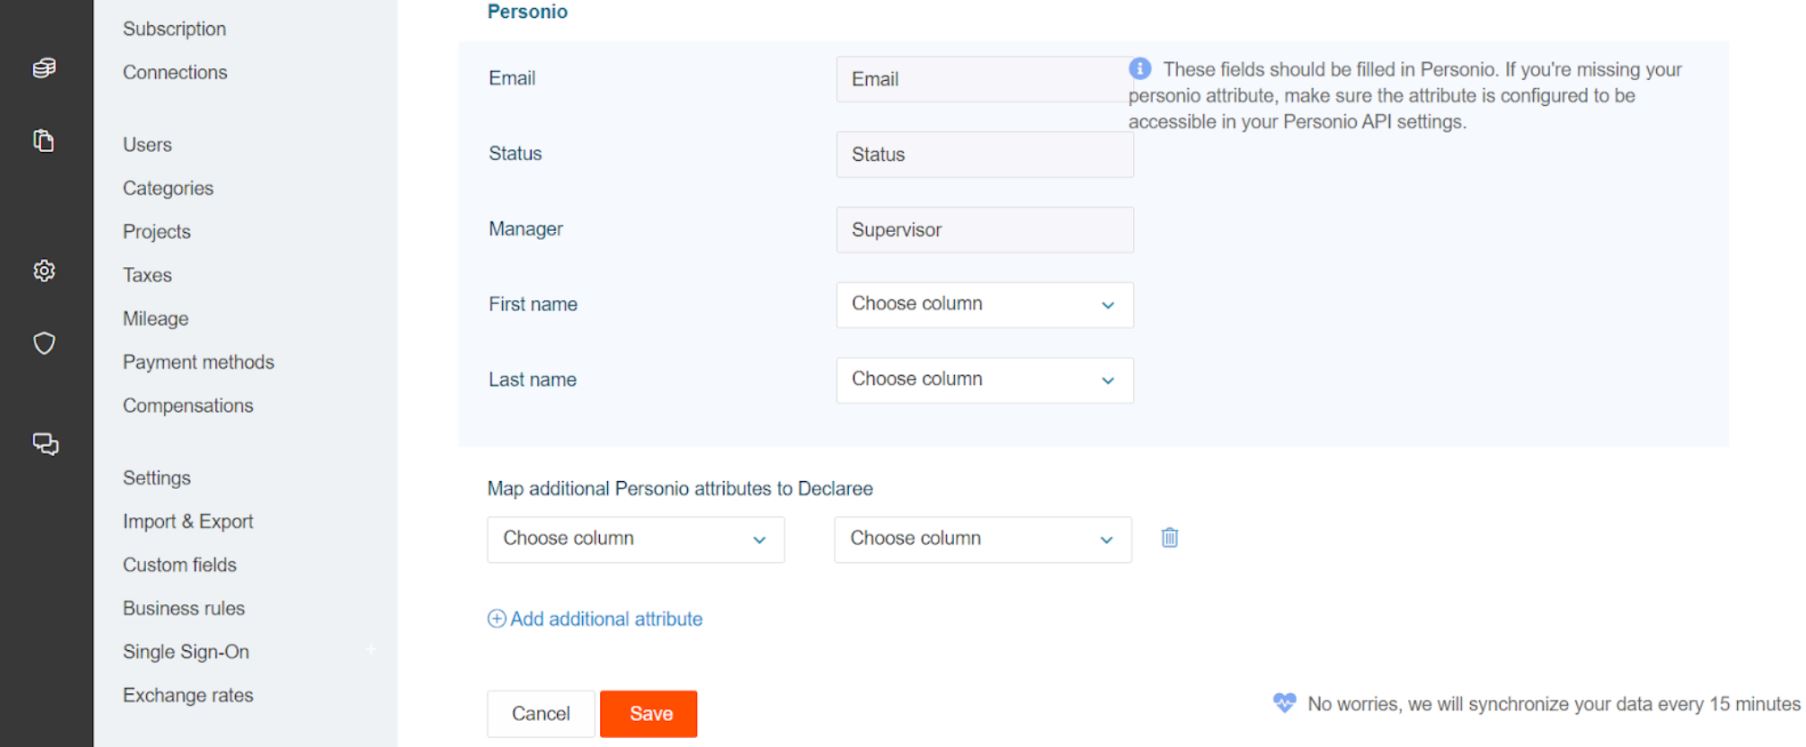
What Data Is Transferred?
The following standard fields are automatically imported into Declaree:
-
First name
-
Last name
-
Email
-
Status
-
Supervisor
Make sure these fields are filled out in Personio to ensure successful synchronization.
You can also map additional attributes, such as cost centers or departments. See Additional Set-Up: Custom fields below for more details.
Setting-Up the Personio Integration
Follow these steps to connect your Personio and Declaree accounts:
Step 1: Generate API Credentials in Personio
-
Log into Personio.
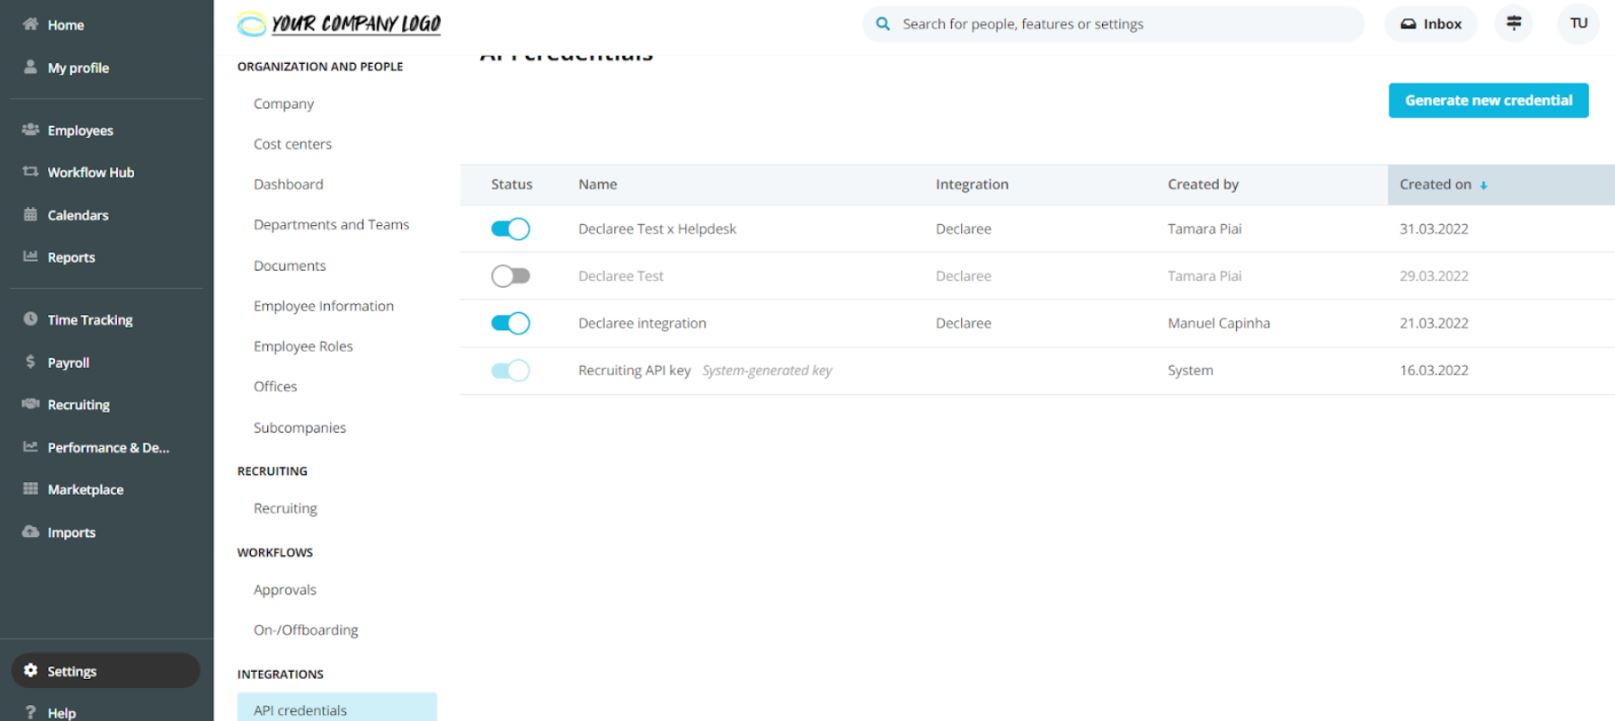
-
Go to Settings → API Credentials → Generate New Credential.
-
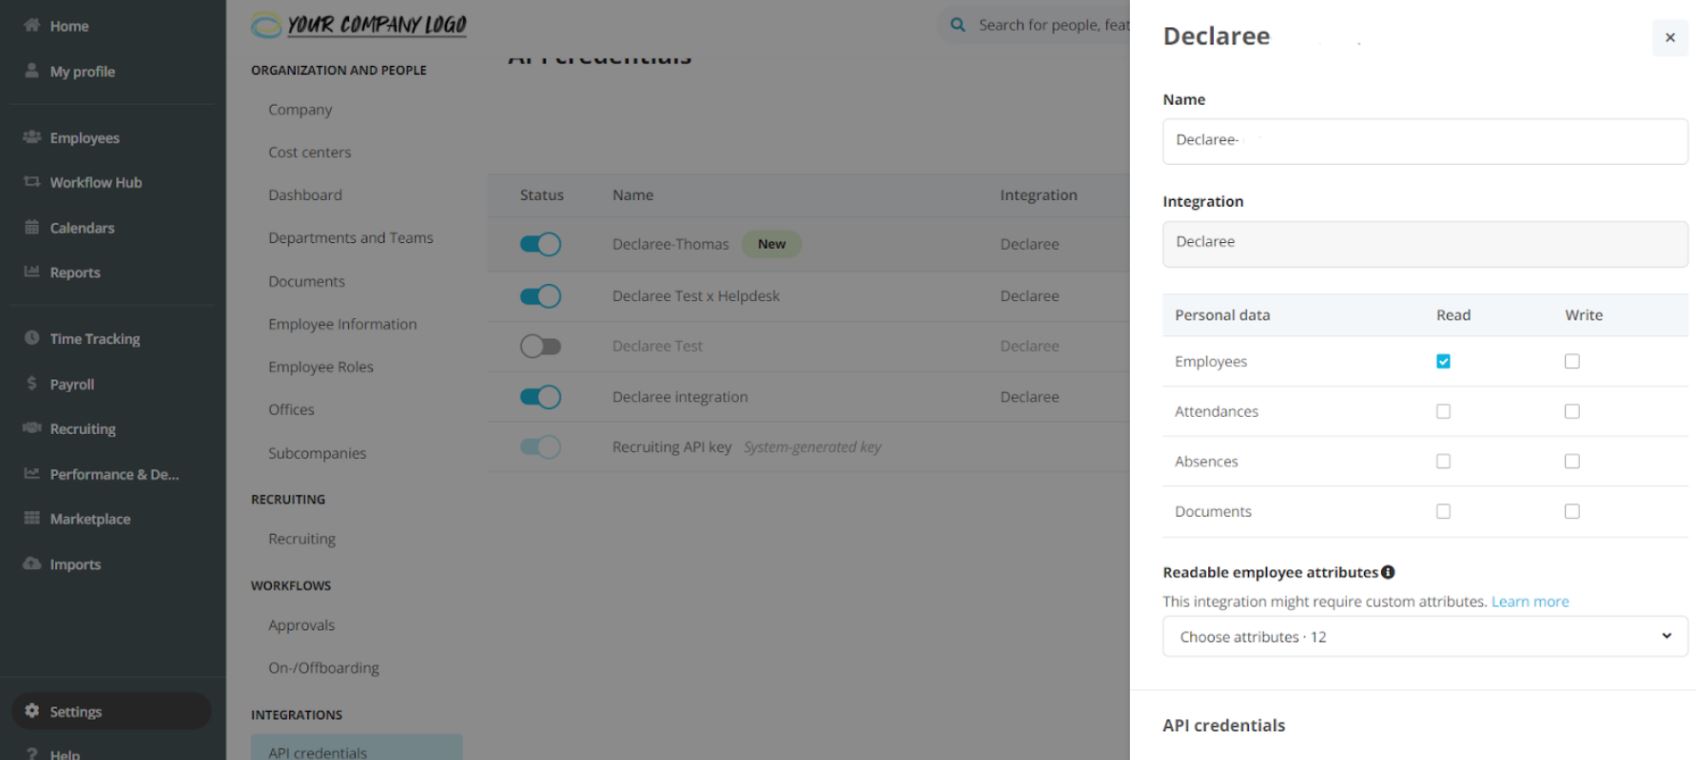
Enter a name (e.g., Declaree Integration).
-
In the Integration field, select Declaree.
-
Toggle on at least these attributes:
-
First name
-
Last name
-
Email
-
Status
-
-
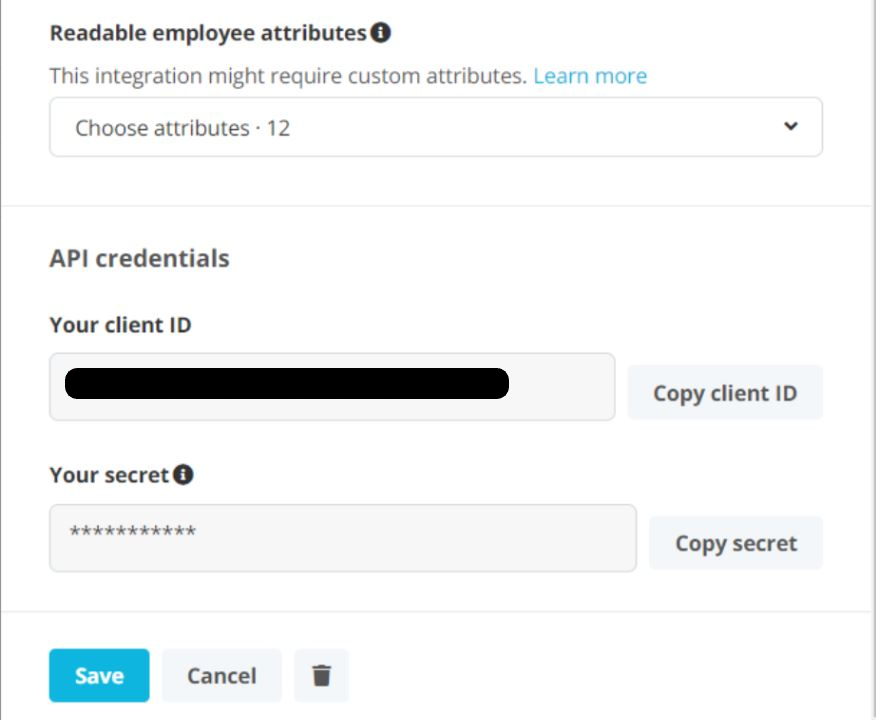
Click Generate New Credentials and copy the Client ID and Client Secret.
Step 2: Connect Personio in Declaree
-
Log into your Declaree account.
-
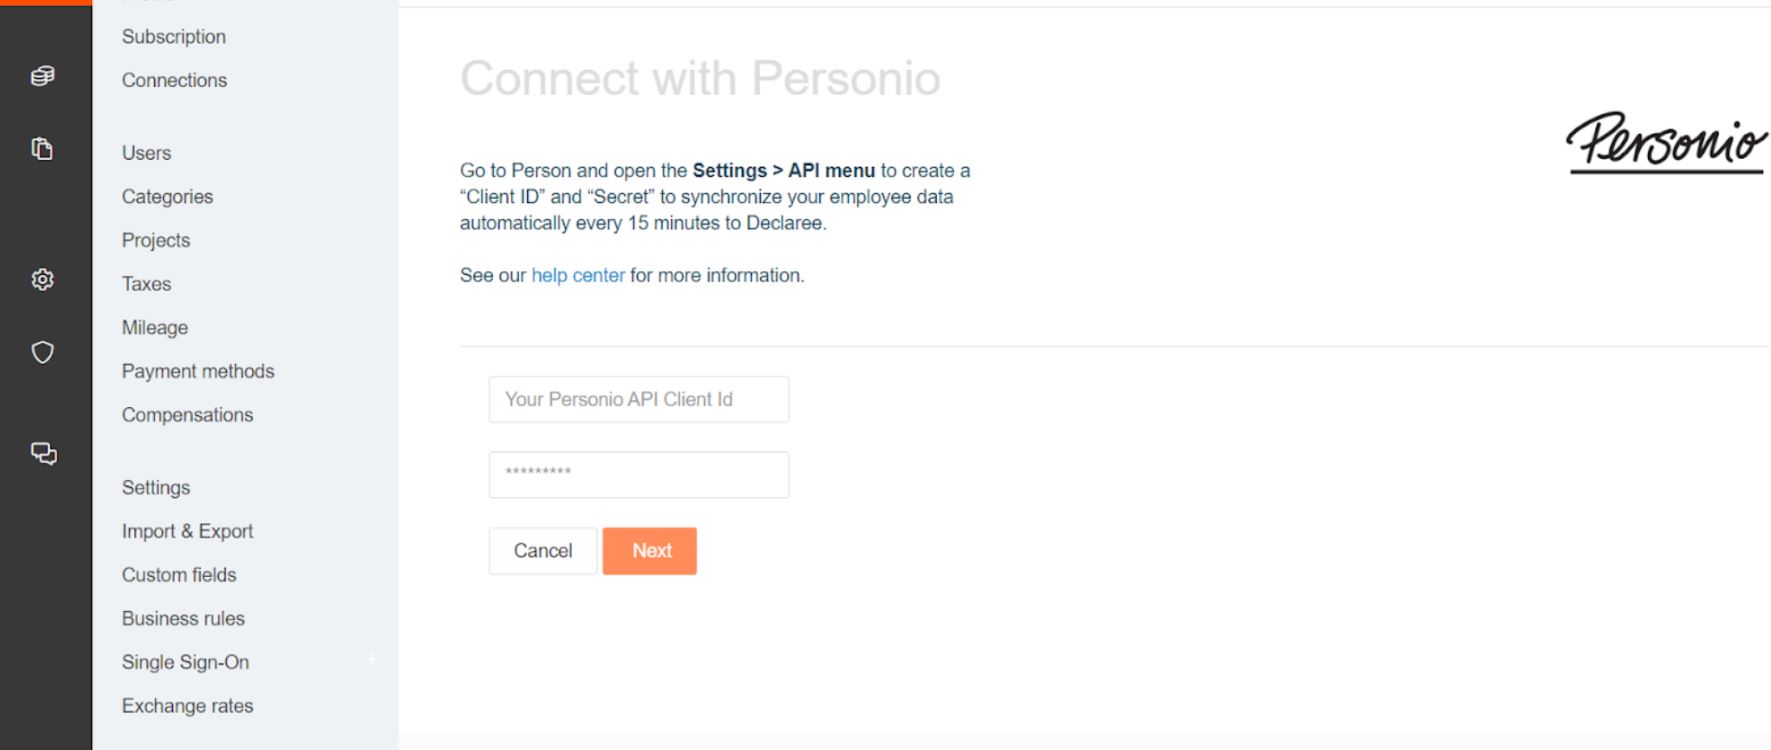
Navigate to Configuration → Connections → Personio.
-
Click Connect.
-
Enter your Client ID and Client Secret, then click Next.
Once connected, Declaree will start syncing user data from Personio every 15 minutes.
Mapping Custom Fields (Optional)
Want to sync additional data like cost centers or departments? You can map custom fields between Personio and Declaree.
Step-by-Step: Map Custom Fields
-
In Declaree, go to Configuration → Custom Fields.
-
Click Add Field → choose User Field.
-
Name the field (e.g., Cost Center) and set the type to Free Text.
-
Click Save.
Next:
-
In Personio, go to your Declaree Integration Settings.
-
Under Readable Employee Attributes, enable the field you want to map (e.g., Cost Center).
Then:
-
In Declaree, go to Configuration → Connections → Personio → Edit.
-
Under Additional Mapping, click Add Additional Attribute.
-
Select the custom field from Declaree and map it to the corresponding Personio field.
-
Click Save.
🔄 You can manually trigger a sync anytime via:
Configuration → Connections → Personio → Synchronize
Working with Multiple Declaree Sub-Administrations
If your organization uses multiple sub-administrations in Declaree (e.g., one per legal entity or office), you’ll need to set up the Personio integration in each one individually.
How to Set Up for Sub-Administrations
-
In Declaree, go to the relevant sub-administration.
-
Navigate to Configuration → Connections → Personio → Connect.
-
Use the same API credentials from Personio to establish the connection.
-
Once connected, refresh the page.
-
A new field, Subcompanies, will appear.
-
Select the correct legal entity from Personio that matches this Declaree sub-administration.
This ensures only relevant employees from each legal entity are imported into their corresponding Declaree environment.
Granting Manager Access Across Multiple Declaree Environments
If a manager needs access to another Declaree environment — for example, to approve expense reports for teams across legal entities — you can easily enable this using the Sticky option.
👉 See this article for a step-by-step guide: How to use the Sticky option when importing employee data