
This guide explains how to configure Single Sign-On (SSO) with Okta for Declaree using SAML 2.0.
Step 1: Retrieve Information from Declaree
-
Log into your Declaree administration as an administrator.
-
Go to Configuration → Single Sign-On.
-
In the General tab:
-
Enter a required subdomain (e.g., your company domain).
-
Enter your email domain.
-
Make a note of these values.
-
-
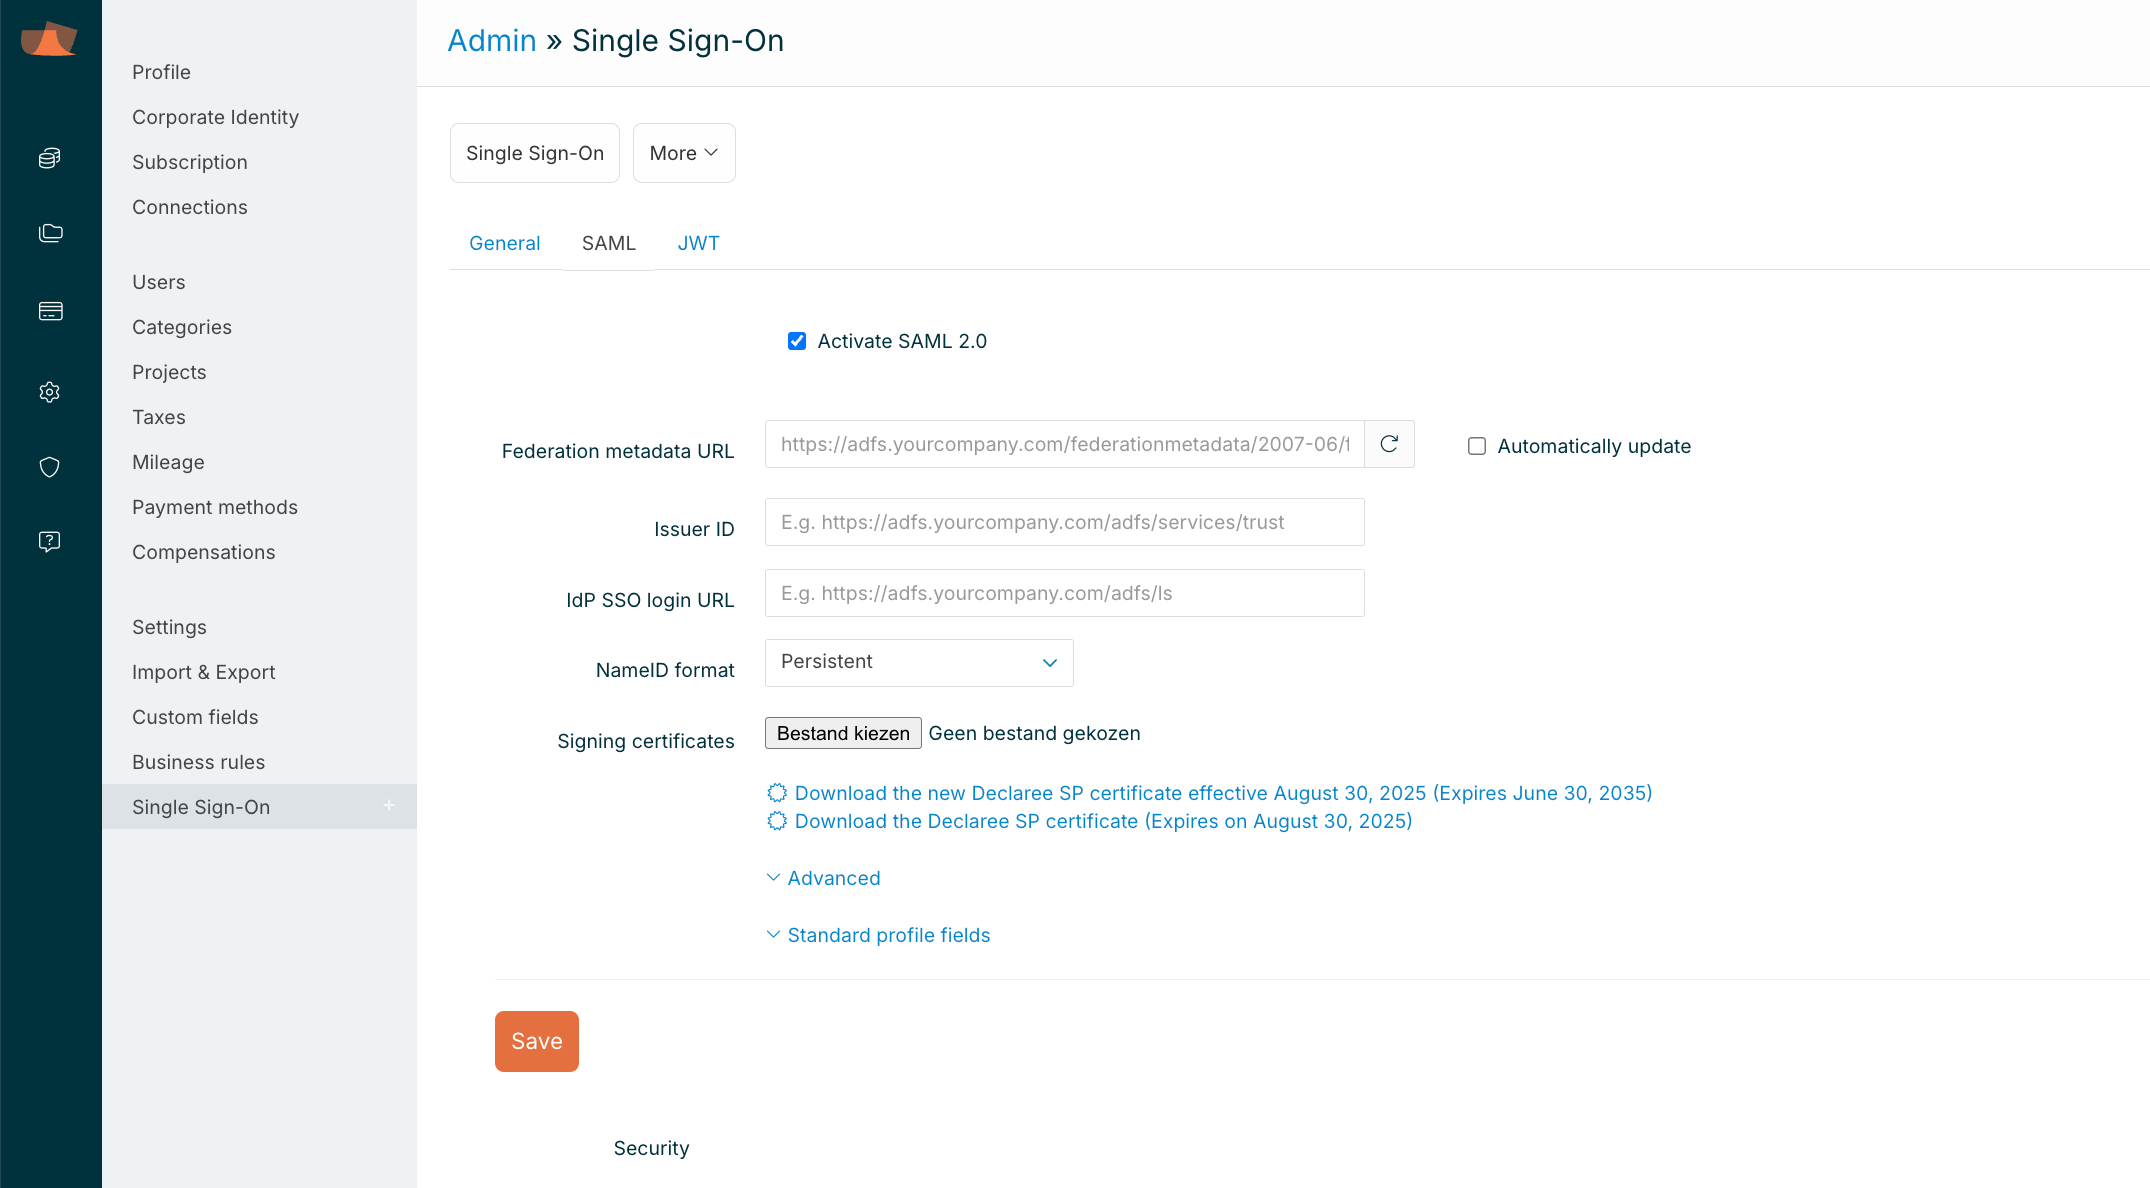
Go to the SAML tab:
-
Check Activate SAML 2.0 and and download the federation metadata.
-
Step 2: Configure Okta
-
Log into your Okta instance as an administrator.
-
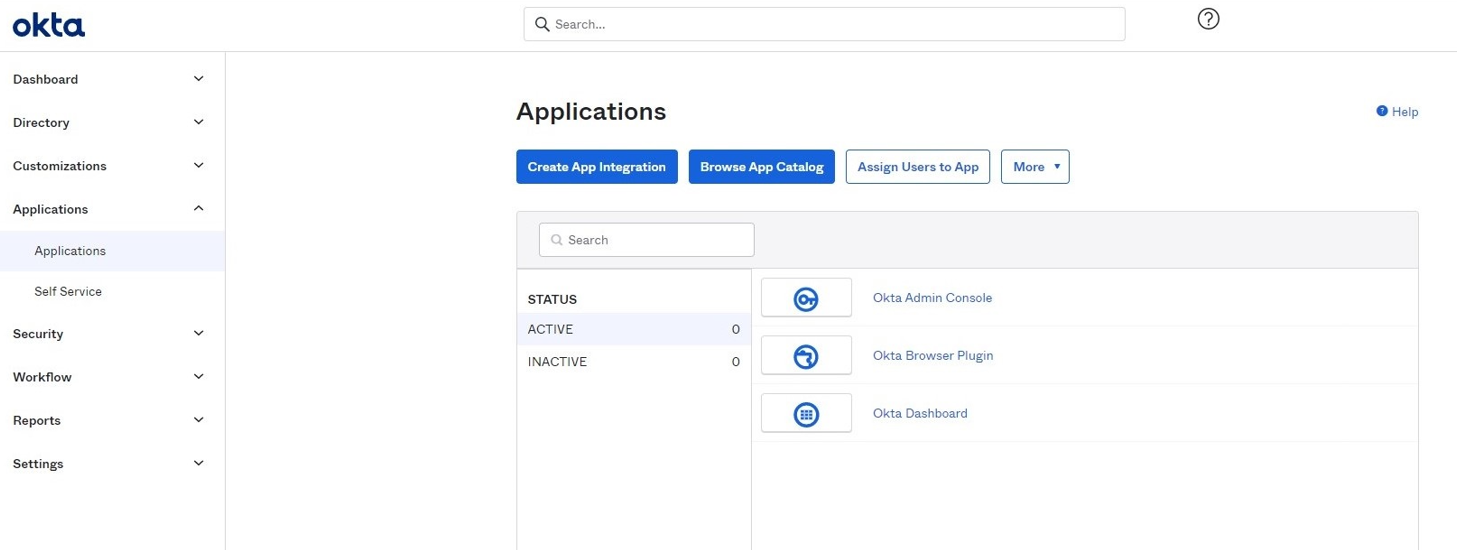
Go to Applications → Applications.
-
Click Create App Integration.
-
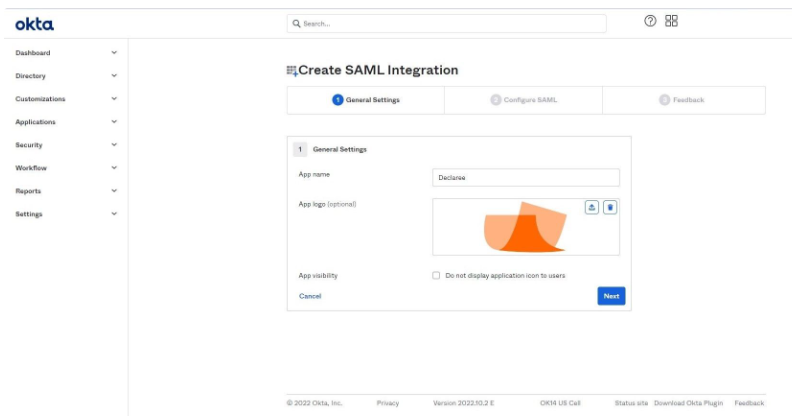
In the popup, select SAML 2.0, then click Next.
General Settings
-
Enter an App name (e.g., “Declaree”).
-
(Optional) Upload the Declaree logo.
-
Click Next.
Configure SAML
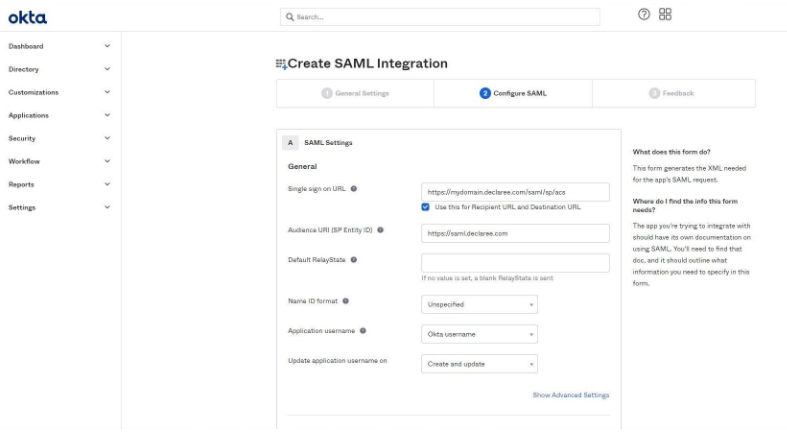
-
Single sign-on URL: copy the AssertionConsumerService Location from the federation metadata XML (step 1).
-
Audience URI (SP Entity ID): copy the entityID from the metadata.
-
Example: https://saml.declaree.com or https://saml.declaree.de.
-
-
If you are not using email addresses as Okta usernames, set Application username to Email.
-
Click Next.
Feedback
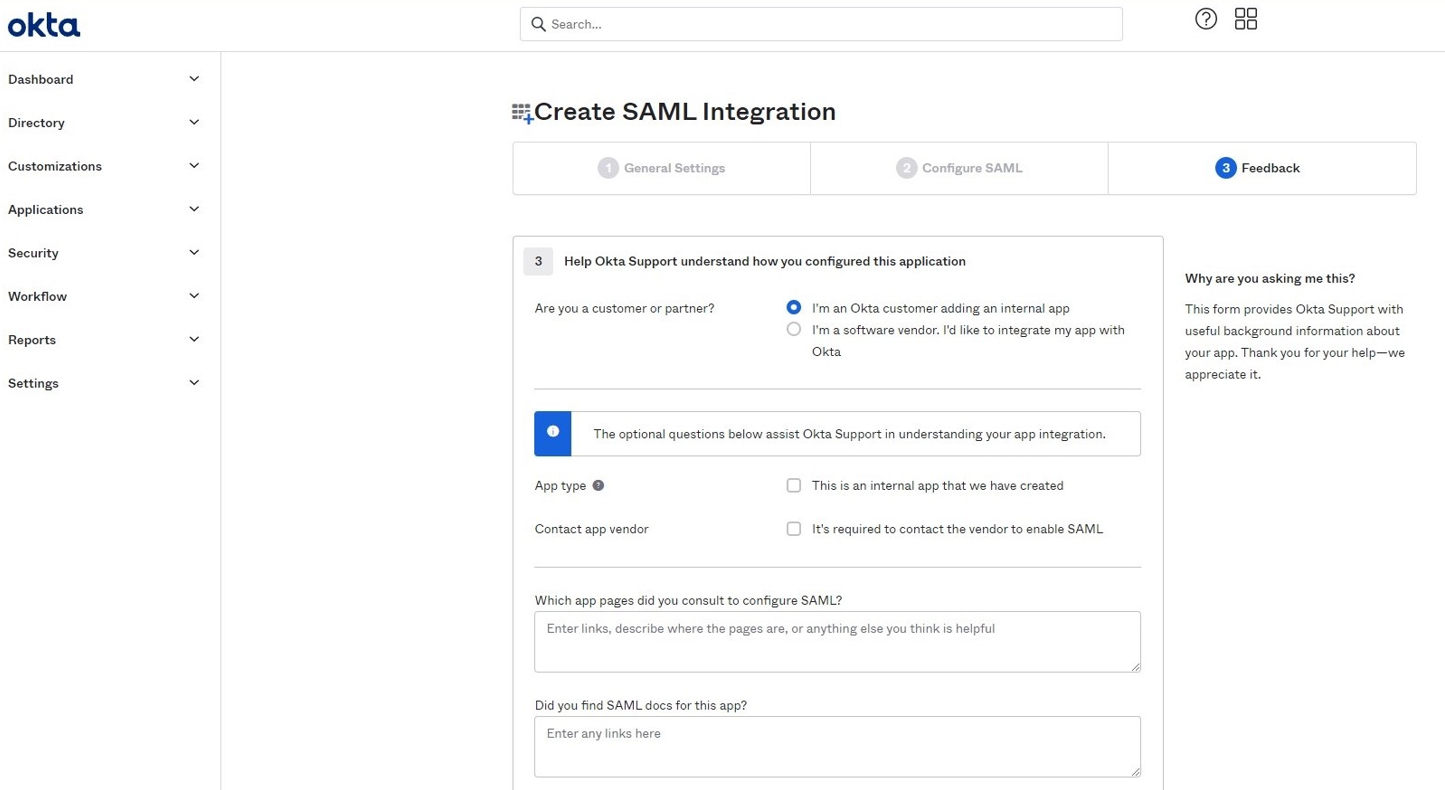
-
Select I’m an Okta customer adding an internal app.
-
Click Finish.
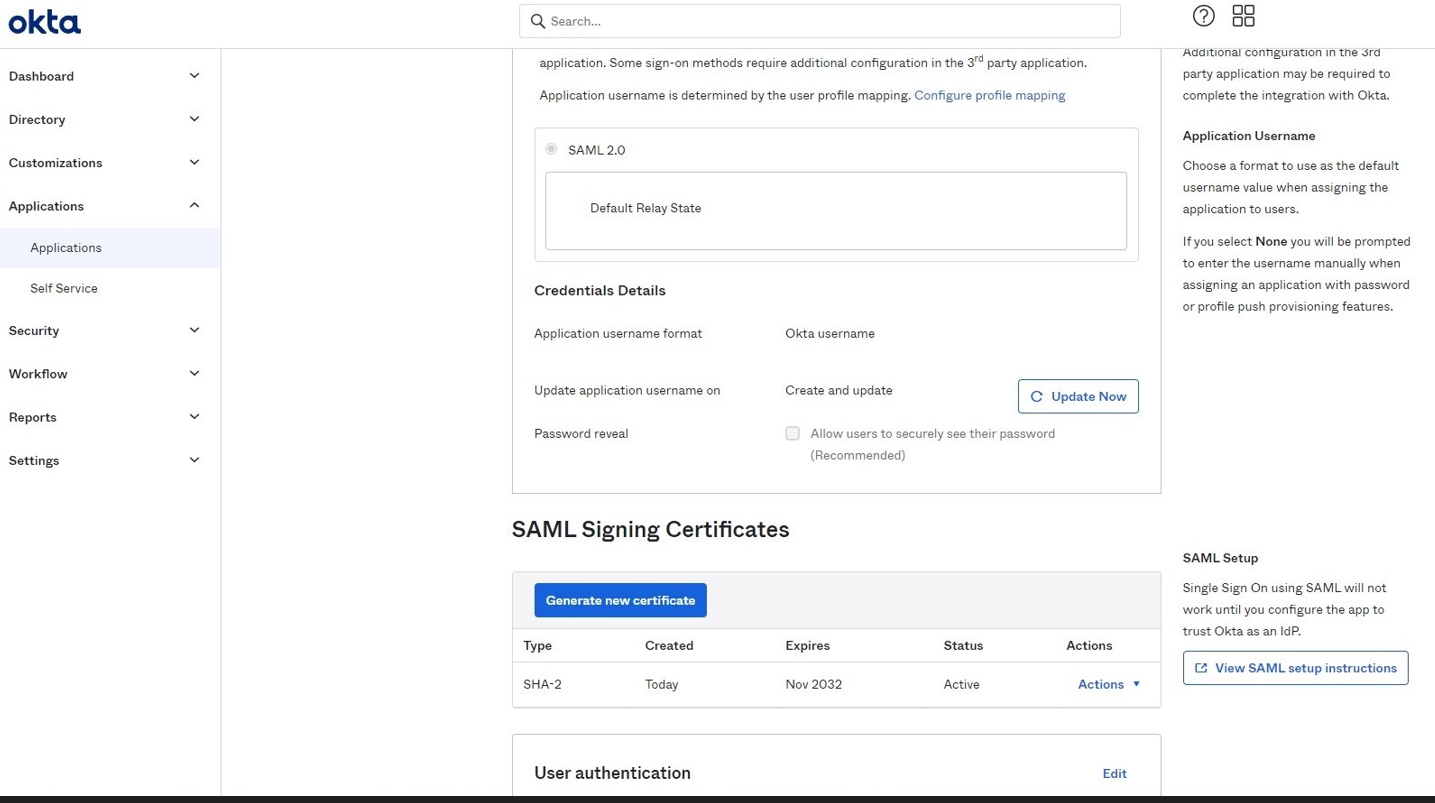
Post-Setup
-
You’ll be redirected to the Declaree integration page in Okta.
-
In the Sign On tab, scroll down and click View SAML setup instructions (keep this page open).
-
In the Assignments tab, assign Declaree to the relevant people or groups.
Step 3: Fill in the Declaree SSO SAML Form
-
In Declaree, go to Admin → Single Sign-On → SAML.
-
Complete the form:
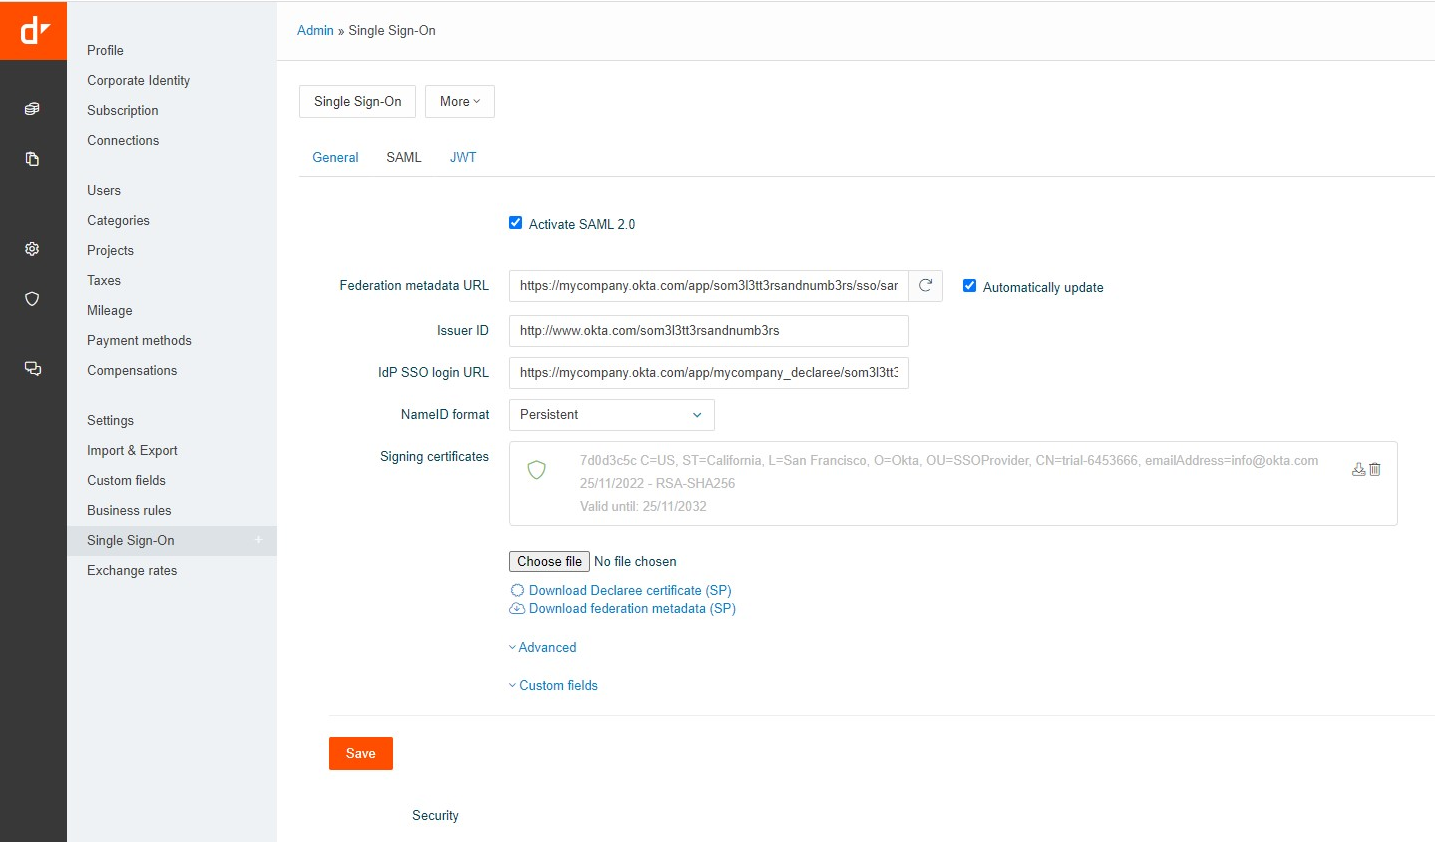
Federation metadata URL:
-
Copy the Identity Provider Single Sign-On URL from Okta (step 2).
-
Remove the section between /app/.../sso/.
-
Add /metadata at the end.
-
Example: https://mycompany/app/som3l3tt3rsandnumb3rs/sso/saml/metadata.
-
Check Automatically update to keep metadata up to date.
-
IdP SSO login URL: copy the Identity Provider Single Sign-On URL from Okta.
-
Issuer ID: copy the Identity Provider Issuer value from Okta.
-
NameID format: leave as Persistent.
-
Signing Certificate: download the certificate from Okta and upload it here.
-
Click Save.
Step 4: Test the Login
Go to your Declaree subdomain (https://mydomain.declaree.com or https://mydomain.declaree.de) and log in using SSO.
✅ If successful, your Okta SSO setup is complete.
This setup requires that the SCIM/SSO module is enabled for your account. Contact your Declaree administrator or our Support Team if you’re not sure.