
This guide explains how to configure Single Sign-On (SSO) between Declaree and Microsoft Entra ID (formerly Azure AD) using SAML 2.0.
While the screenshots in this guide are from the Azure portal, the same steps apply in the Microsoft Entra admin center.
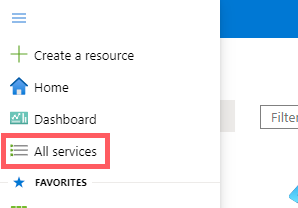
1. Log in to Azure
-
Go to portal.azure.com.
-
Sign in with your Microsoft account (create one if you don’t have it yet).
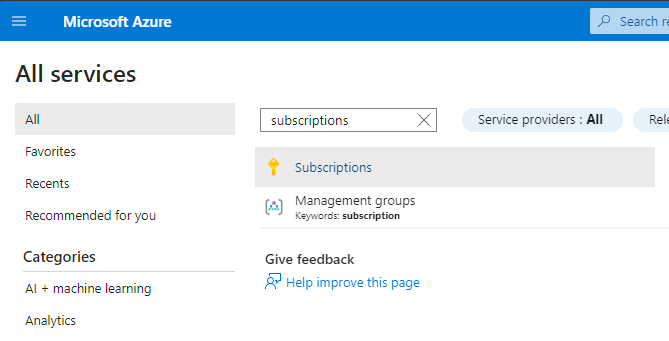
2. Subscription Check
-
If you already have an active Microsoft Azure subscription, skip to Step 3.
-
Otherwise, register for a subscription:
-
On the homepage, follow the link to get started, or
-
Go to Menu → All services → Subscriptions.
-
Once registered, continue with the next step.
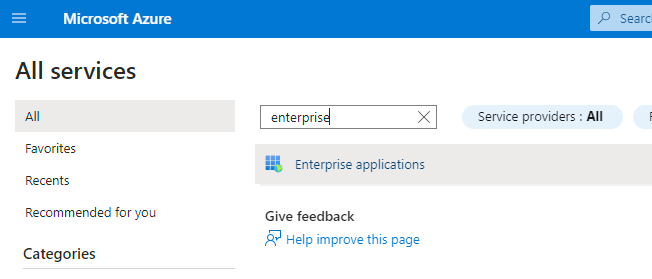
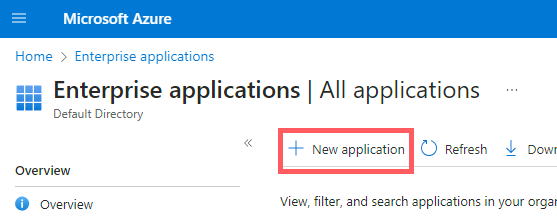
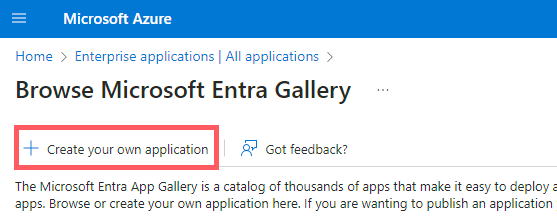
3. Create a New Enterprise Application
-
In the Azure portal, go to All services → Enterprise applications.
-
Click New application.
-
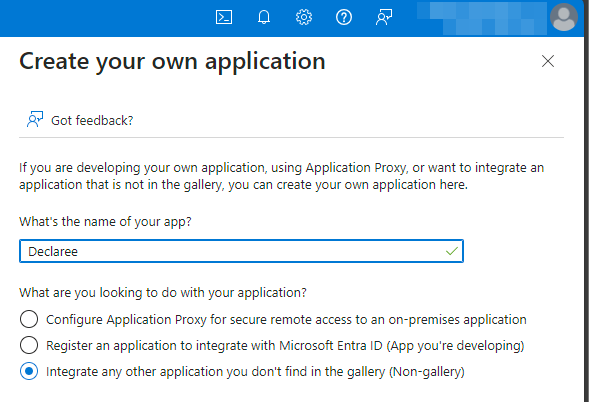
In the Microsoft Entra Gallery, click Create your own application.
-
Enter a name (e.g., Declaree).
-
Select Integrate any other application you don’t find in the gallery (Non-gallery).
-
Click Create.
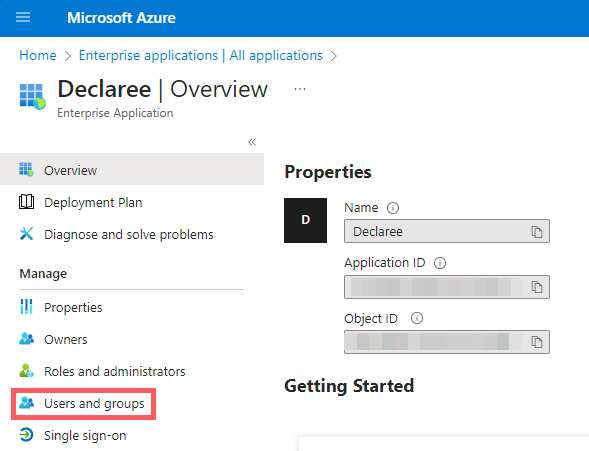
You’ll be redirected to the app’s Overview page.
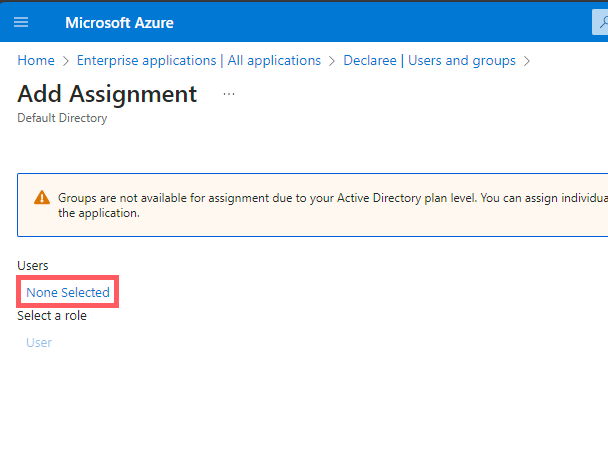
4. Add Users
-
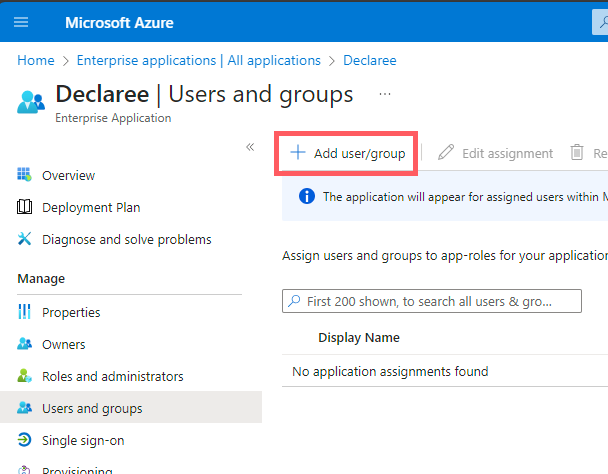
In Microsoft Azure, go to Users and groups.
-
Click Add user/group.
-
On the Add Assignment page, click None selected.
-
A panel opens on the right. Select the users you wish to add → click Select.
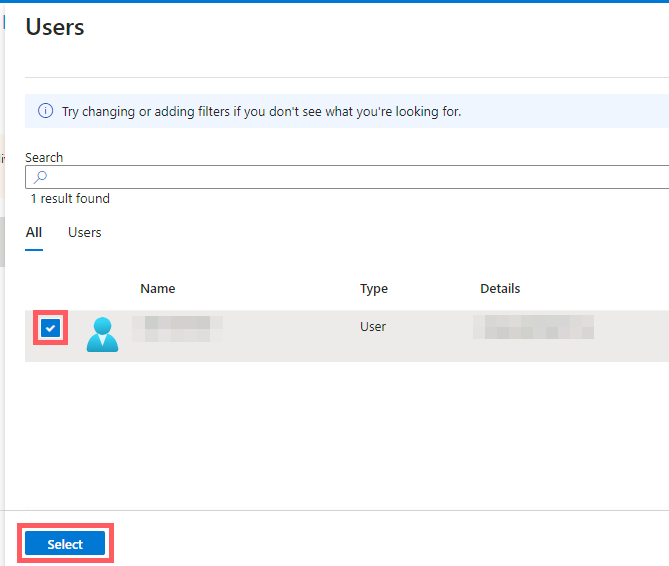
-
Click Assign to finalize.
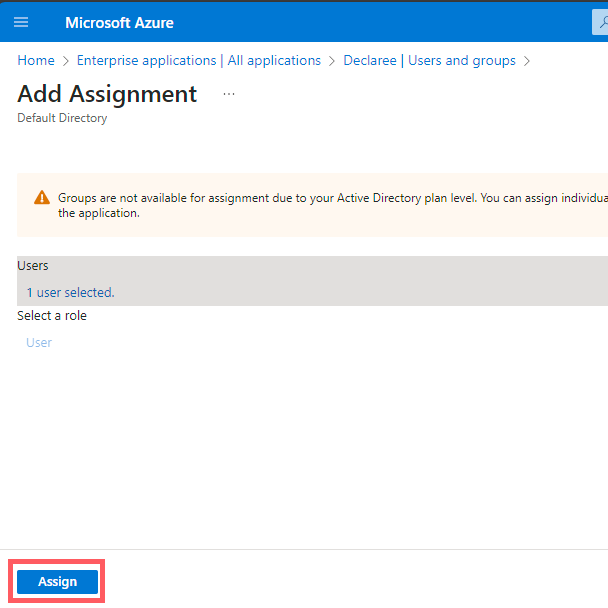
These users can now log in to Declaree with SSO. In the next section, we’ll set up a unique subdomain which we will link to your organization’s Azure directory.
5. Find or Set Your Declaree Subdomain
Each organization within Declaree is provided with a unique subdomain. This subdomain will serve as the entry point for your users and ensures that Declaree connects to your Azure account specifically, preventing any mix-ups with other accounts.
-
In Declaree, go to Configuration → Single Sign-On → General tab.
-
Note your subdomain (e.g., yourcompany.declaree.com).
-
You may change it if it’s too long or unclear.
-
This subdomain will link your organization to your Azure directory.
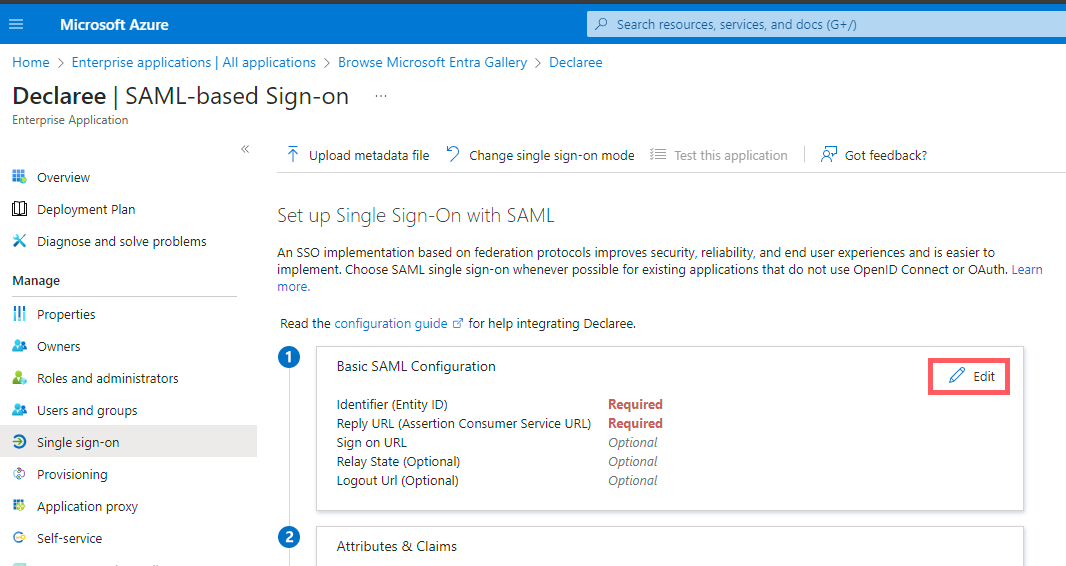
6. Configure SSO in Azure
-
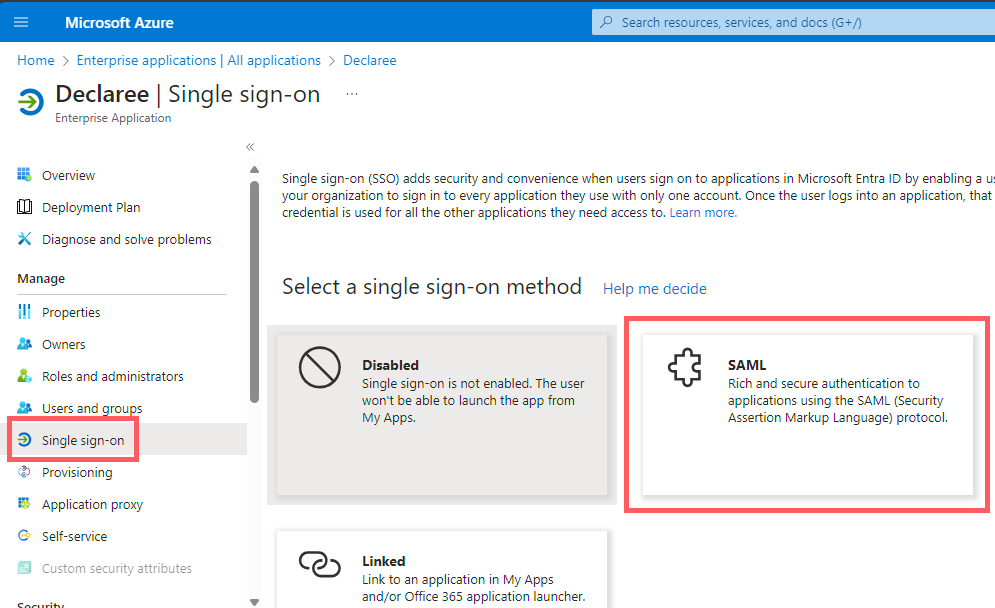
In the Azure portal, open your Declaree enterprise application.
-
From the left-hand menu, click Single sign-on.
-
Select SAML as the sign-on method.
-
In Basic SAML Configuration, click Edit.
-
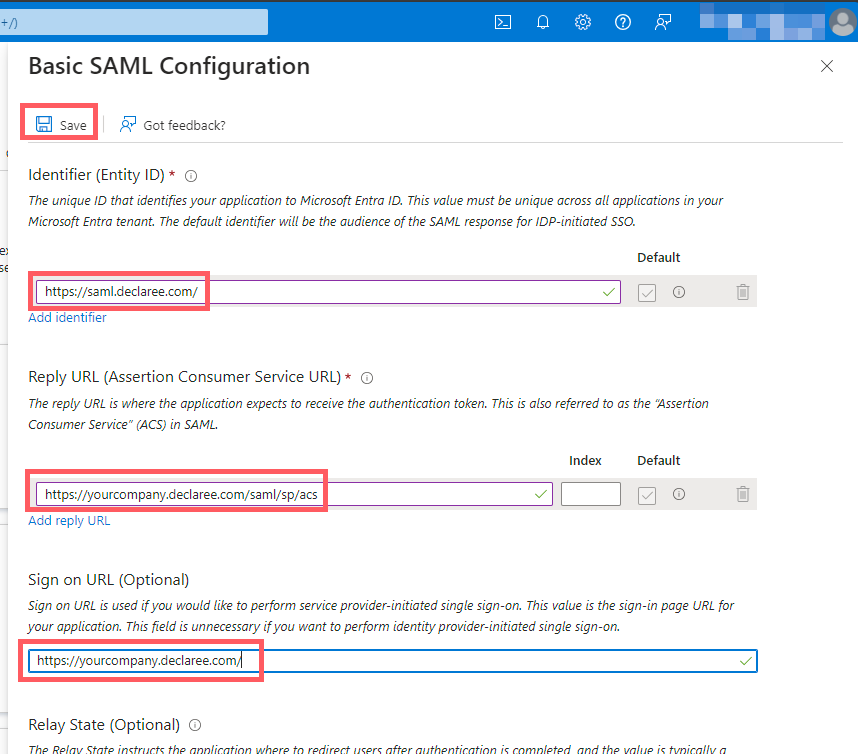
Enter the following values (replace yourcompany with your Declaree subdomain):
-
Identifier (Entity ID): https://saml.declaree.com or https://saml.declaree.de
-
Reply URL (Assertion Consumer Service): https://yourcompany.declaree.com/saml/sp/acs or https://yourcompany.declaree.de/saml/sp/acs
-
-
Click Save.
-
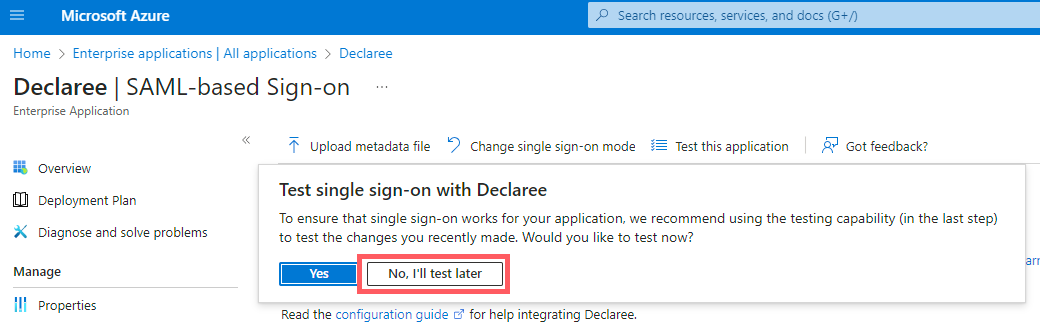
When prompted to test, select No, I’ll test later, since you still need to configure Declaree.
7. Setting up Single Sign-On in Declaree
-
In Declaree, go to Configuration → Single Sign-On → SAML tab.
-
Check Activate SAML 2.0.
-
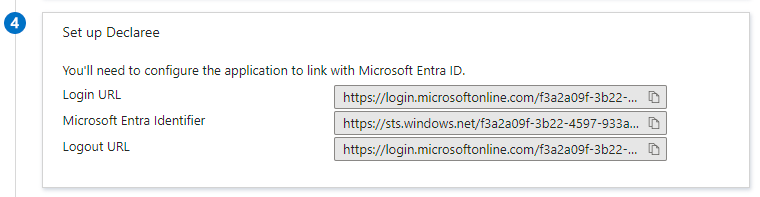
In the Azure portal (Step 3 of SSO setup), copy the App Federation Metadata URL.

-
Paste it into the Metadata URL field in Declaree.
-
Click the reload button.
-
Declaree will automatically import the Issuer ID, SSO login URL, and certificate.
-
If this fails, fill in the values manually:
-
If this fails, you can enter this data manually. The table below describes which details to fill in:
|
From Azure… |
To Declaree… |
Note |
|---|---|---|
|
Certificate (Base64) |
Signing certificates |
Download from Azure, upload to Declaree. |
|
Login URL |
IdP SSO login URL |
|
|
Microsoft Entra Identifier |
Issuer ID |
|
|
Logout URL |
IdP SSO logout URL |
In Declaree, click “Advanced” to reveal this field |
-
Set NameID format to Email (unless your setup requires usernames).
-
Click Save.
8. Test the Connection
You can test the connection in two ways:
-
In Azure: scroll to Step 5 of the SSO setup page and click Test.
-
In Declaree: go to https://yourcompany.declaree.com (or .de) and try to log in.
If successful, users can now log in with SSO.
Troubleshooting
Solutions for common problems.
1. User Not Assigned to a Role
Error:
AADSTS50105: Your administrator has configured the application Declaree ('XXX') to block users unless they are specifically granted ('assigned') access to the application. The signed in user 'XXX@XXX.XXX' is blocked because they are not a direct member of a group with access, nor had access directly assigned by an administrator. Please contact your administrator to assign access to this application.
Solution: Add the user to the Declaree application (see Step 4)
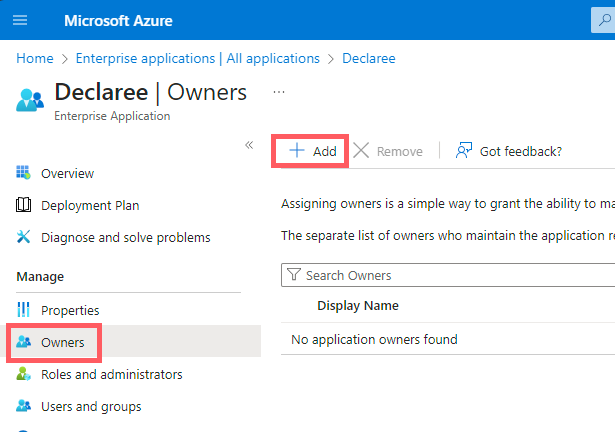
2. Application Not Found in Directory XXX
This error appears if the app creator is not listed as an owner.
Solution: In Azure, open your Declaree app → go to Owners → Add.
3. 401 - “Could not find user”
Possible causes:
-
The user does not exist in Declaree → create the user in Declaree.
-
Incorrect details → check for typos and ensure the Azure email matches the Declaree email.
-
Wrong NameID format → in Declaree, go to Configuration → Single Sign-On → SAML tab and correct the mapping.