
This guide explains how to configure Okta provisioning with Declaree using SCIM.
Requirements
Before you start, make sure the following requirements are met:
-
Create a dedicated user account in Declaree with admin rights.
If you have more than one organization, add this account to the parent organization (the default organization for provisioned users). -
To sync groups successfully, ensure that each group name is unique. Duplicate group names will not be linked.
Step 1: Retrieve Information from Declaree
-
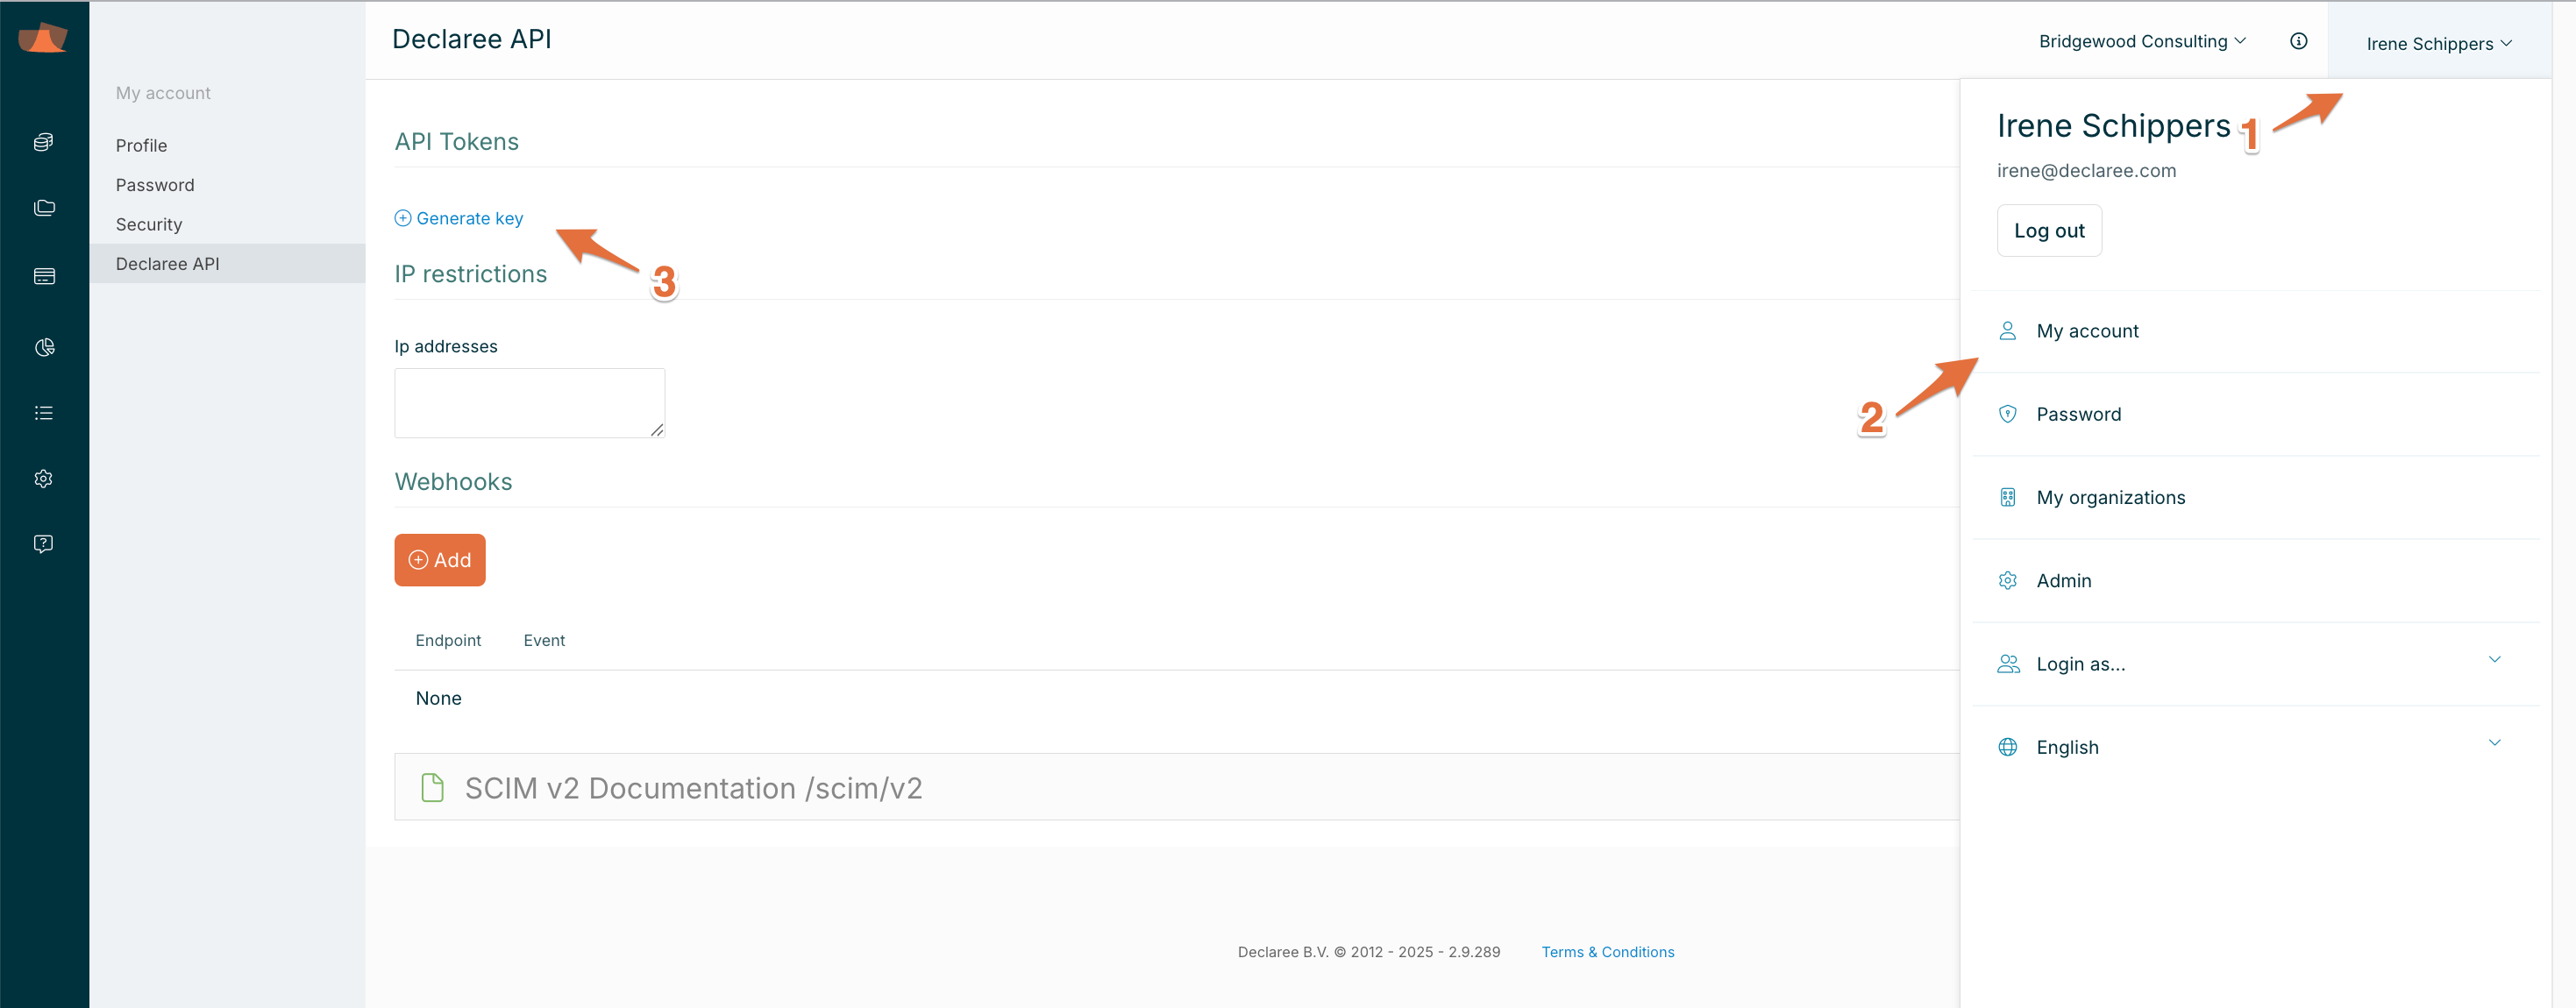
Log into your Declaree instance as an admin (preferably using the dedicated account).
-
Navigate to My Account → (click your name in the top-right corner).
-
Go to the Declaree API tab.
-
Click Generate Key and copy the generated key. You’ll need this later.
Step 2: Configure Okta
-
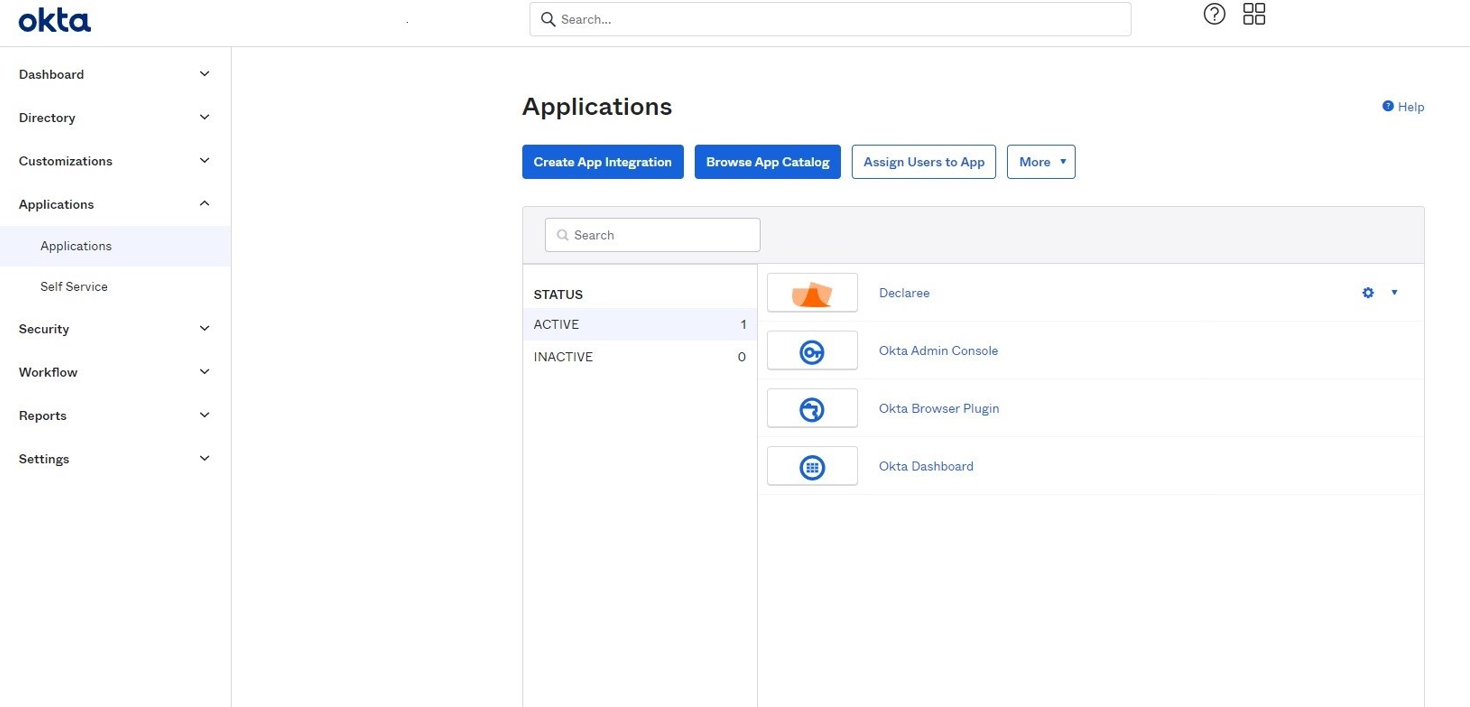
Log into your Okta instance as an administrator.
-
Navigate to Applications → Applications.
-
Select the Declaree application.
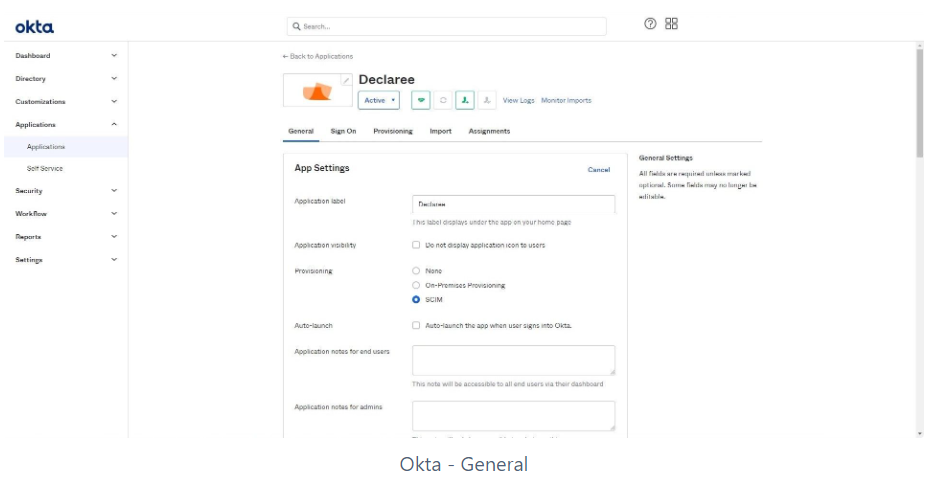
General Tab
-
Go to the App Settings section.
-
Click Edit.
-
Select the SCIM option for provisioning.
-
Click Save.
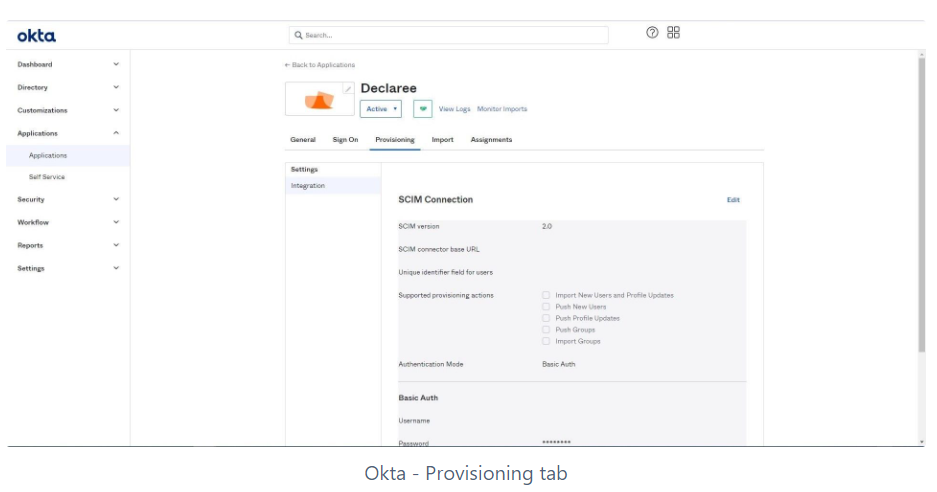
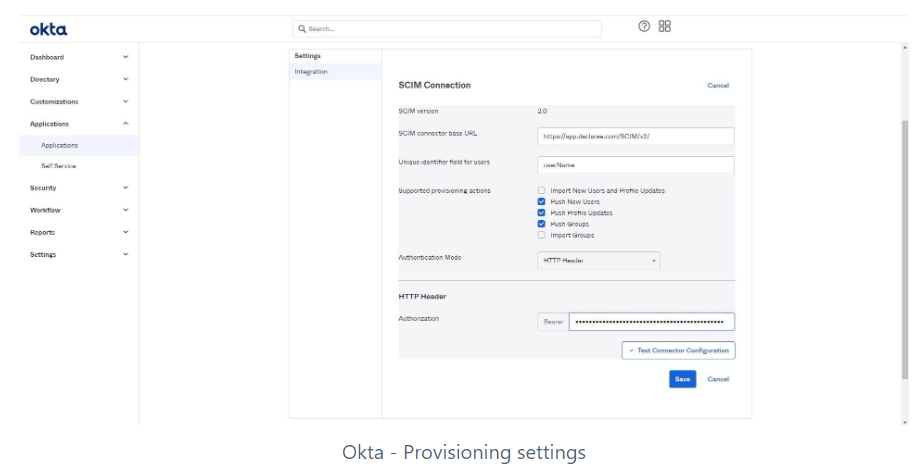
Provisioning Tab
-
Click Edit.
-
In SCIM connector base URL, enter:
-
https://app.declaree.com/SCIM/v2/ (for EU instance)
-
https://app.declaree.de/SCIM/v2/ (for DE instance)
-
-
In Unique identifier field for users, enter:
-
userName
-
-
In Authentication Mode, select HTTP Header.
-
In Authorization, paste the API key you generated in Step 1.4.
-
Click Test Connector Configuration.
-
If successful, click Save.
-
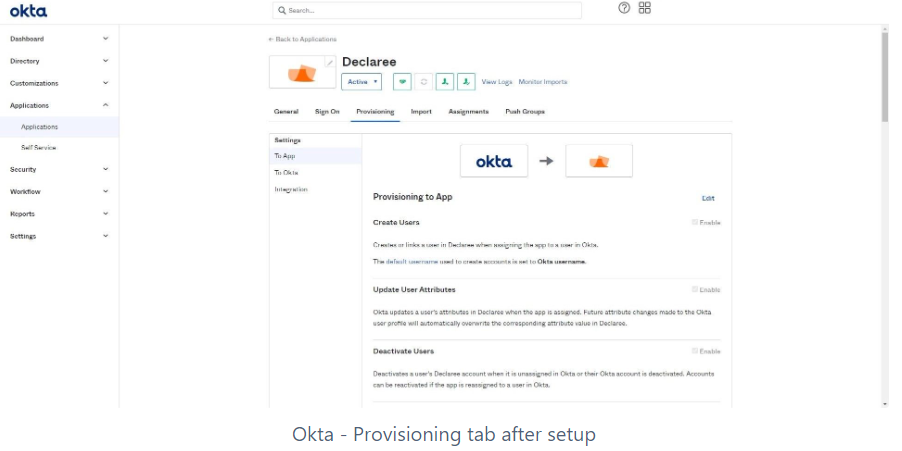
Step 3: Enable Provisioning Actions
In the Provisioning tab, you can now:
-
Enable actions such as Create Users and Update User Attributes.
-
Map Declaree attributes with Okta attributes.
👉 Note: We recommend disabling import from Declaree to Okta, as all user management should occur from Okta.
Step 4: Assign Users in Okta
-
Go to the Assignments tab.
-
Add users to the Declaree application.
Your Okta provisioning with Declaree is now configured.
(Optional) Map Organization via Custom SCIM Attribute (Per-Org Setup)
Use this step only if you want to manage users per organization in Declaree via Okta.
1. Add a Custom Attribute in Okta
-
In Okta Admin Console, go to
Applications → [Your SCIM App] -
Open the Provisioning tab and click Profile Editor
-
Click Add Attribute
-
Create the attribute with the following values:
-
Display name: Organization
-
Variable name:
organization -
Data type: String
-
External name:
organization -
External namespace:
urn:ietf:params:scim:schemas:extension:enterprise:2.0:User
-
-
Map this attribute to the corresponding attribute in Okta (e.g. a user profile field or group-based value)
2. Configure the Organization in Declaree
-
In Declaree, go to Configuration → Profile
-
Set the Organization attribute on the user profile
-
Use the Code value
-
Ensure it matches the organization value sent from Okta via SCIM
-
This ensures that the organization defined in Okta is correctly mapped to the organization in Declaree.